No-sew DIY bow hair ties
Make ponytail holders for the kids—okay, and maybe the adults too. These no-sew DIY bow hair ties are easy and inexpensive. Use any ribbon and hair ties you already have to create bows in whatever color or style you desire!
They’re perfect DIYs for your own tribe, but this craft also makes for great gifts. Raid the ribbon section at your local craft store and let the fun ideas run wild.
The best part about this craft is that you can make the bows as big or small as you like, and there’s no sewing involved. Handy dandy fabric glue makes everything easier! Moreover, this DIY becomes even more cost effective if you purchase elastic to make your own no-snag hair ties.
how to make DIY bow hair ties
Ingredients
- assorted ribbon
- pipe cleaners
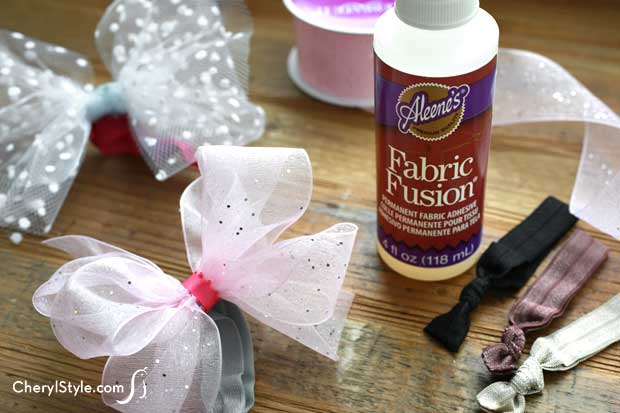
- fabric glue
- scissors
- no snag hair ties
- binder clips (optional)
Instructions
- Take a strip of ribbon and make a bow in the size and shape of your liking. Secure the center of the bow tightly by wrapping a pipe cleaner around the bow and twisting the wire, like you would use a twist tie. Snip excess pipe cleaner with scissors.
- Next, dab some fabric glue on the bottom of the bow then glue it on the center of the no-snag hair tie—make sure the hair tie knot is at the bottom. Keep the hair tie and the bow pinched between your two fingers, then carefully wrap a smaller strip of ribbon around the center of the bow and hair tie, adding a dab of fabric glue periodically to hold in place.
- Once you’re satisfied with the bow, trim excess ribbon if necessary, then set aside to dry overnight. If desired, use a binder clip to hold the center of the bow and hair tie together while the fabric glue dries.
Notes
While the binder clips are optional, they’re highly recommended. It’s the easiest way to ensure the fabric glue dries well overnight!