DIY family photo memory game
Looking for a game that’s challenging, fun and personal to your family? Our DIY family photo memory game challenges kids to concentrate by matching photo cards. This game is inexpensive to make, easily transported and the kids will love playing with photos of their family, themselves and even their pets!
Sharpen your computer skills and check your ink supply to get started on this DIY. It’s not difficult to do but does require some time, patience and a basic knowledge of resizing digital photos.
Select 32 of your favorite digital photos and follow our instructions below for creating your DIY family photo memory game.
family photo memory game instructions
Ingredients
- 32 digital photos
- 4 or more 8.5″ x 11″ sheets white card stock
- disposable glove
- spray adhesive
- 4 or more 8.5″ x 11″ sheets 40 point chipboard
- cutting mat
- X-acto knife and several fresh blades
- metal ruler
- 4 or more patterned 8.5″ x 11″ sheets card stock
- storage container with stickers (optional)
Instructions
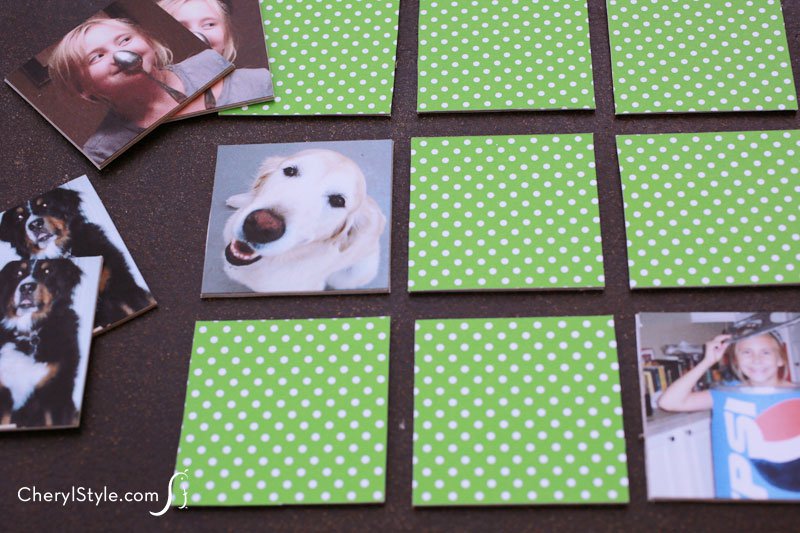
- Select 32 digital photos and save to folder on your desktop.
- Size photos to squares using the following instructions: go to picmonkey.com, choose ‘create a collage’, choose ‘open photos’ from option on left side, select all 32 photos in your saved folder to upload. Find the row of 4 icons to the left of the ‘open photos box’, choose the second icon, ‘layouts’, click on ‘square deals’ and choose the layout with 16 squares. Drag the photos one by one onto the squares (highlight individual photo to edit, if necessary). Click ‘save’ to save collage to your desktop. When all 16 squares have been filled, repeat steps until all 32 photos have been saved to your desktop.
- Open collages on desktop to print and print 2 copies of each on white card stock using best quality print option and set aside.
- Spray adhesive evenly on a sheet of chipboard and wait 15 seconds until tacky (wear a disposable glove on the hand holding the chipboard to prevent your fingers from getting sticky).
- Place 1 sheet of photos on chipboard, carefully smoothing out with ungloved hand to adhere
- flip chipboard over, spray adhesive evenly on unfinished side and wait 15 seconds until tacky
- place patterned card stock on chipboard, press firmly with ungloved hand to adhere and allow to set.
- Trim borders from photos on cutting mat using X-acto knife and metal ruler as guide (keep blades sharp-it may take several firm cuts for each side, as chipboard is somewhat thick).
- Repeat process for remaining photos until all 64 photos have been made into cards.
- Store cards in decorated tin for safe keeping.
- Play game according to Cheryl’s directions.
let’s play!
- The object of the game is to match and collect the most pairs of photos.
- To set up the game, shuffle all the photo cards and place face down on playing surface in 8 rows of 8 cards each.
- To play, first (or only) player turns over random card to expose photo and leaves it in place then tries to find its exact match by turning over a second random photo. If match is found, player removes pair of photos from playing surface, places them aside and continues to play until no match is made. If no match is made, both photo cards are turned over, face down in original ‘spot’ and next player takes turn. Once all photos have been matched and removed from playing surface, individual players count their pairs. Player who has the most pairs of matched photos wins!
Notes
Decoupage your photo cards for a longer lasting finish.