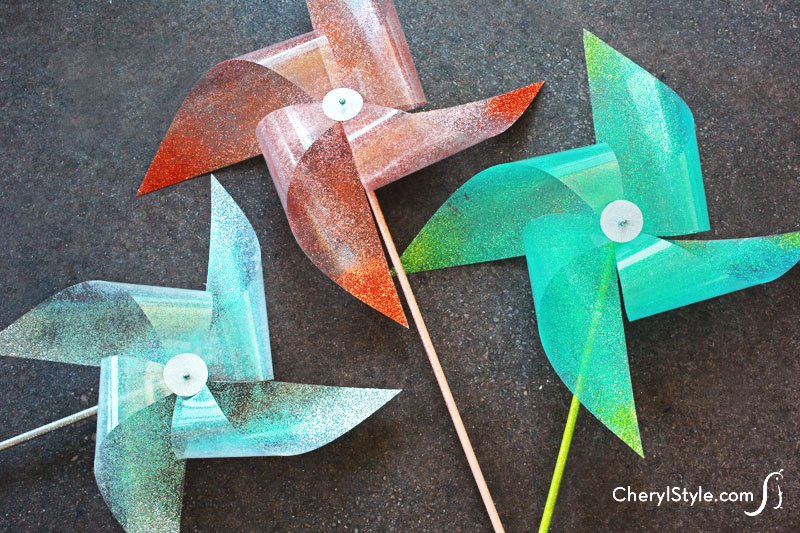
DIY glitter pinwheels
With spring’s arrival and windy days ahead, Audrey, our chief crafter here at Everyday Dishes & DIY, figured it was the perfect time to show you how to make a pinwheel.
We wanted to go with something sparkly and it took a few attempts to get it right—mainly choosing just the right color for the glitter! Dark colored glitter wasn’t nearly as transparent and ended up looking like little clumps of color on the transparency. Pastel shades worked much better for an even coat, especially after a double dose of sprinkling.
The other challenge was to figure out a good way to attach the pinwheel to the dowel so it would actually move. Most pinwheels turn out looking really nice, but they aren’t exactly functional.
Definitely use a dowel as opposed to a skewer because it’s much sturdier and longer. It also means it is thicker, so you’ll need to use an awl (think screwdriver with a very sharp point) to make your hole.
Finally, trying to come up with something other than a cork in which to place the end of the pin proved futile, so just paint one to dress it up a bit. If you have another suggestion, please let us know!
Pinwheels have provided fun for older kids since the 19th century—small parts on ours make it a poor choice for those under the age of three. Nowadays, they make great decorations for parties, planters and covered outdoor areas.
- Everyday Dishes & DIY pinwheel template
- transparency paper
- fine point pen
- ruler
- scissors or X-acto knife
- hole punch
- spray adhesive
- glitter (light colors work better)
- acrylic craft paint and brush
- quilting pin
- ¾” diameter small cork
- ⅜” x 36″ wooden dowel, cut in half
- awl
- glitter scrapbook paper
- 1″ round Die Cut (optional)
- Download Everyday Dishes & DIY pinwheel printable and print.
- Trace the template onto a transparency paper using a fine point pen and ruler as guide. Cut it out using scissors or an X-acto knife then cut out the ‘X.’ Make sure to cut only along the dotted lines or your pinwheel will become petals that blow away in the wind!
- Once cut properly, hole punch as shown on the template—don’t forget to do the one in the center!
- Next, apply spray adhesive, wait a few seconds for it to get tacky then sprinkle glitter over the entire surface. Dust off the excess into a wastebasket, quickly apply more glitter to coat evenly then allow it to dry.
- Since you’re already covered in glitter and haven’t cleaned up yet, you may as well get out your acrylic paint to make the small cork and wooden dowel coordinate with the pinwheel—you may want to paint the quilting pin too.
- When dry, make a hole through the wooden dowel near the top using an awl—we found it to be the perfect tool for the job.
- Scour your collection of scrapbook paper for something sparkly—you only need enough to cut out a 1″ circle (use a Die Cut if you have one). Push the quilting pin through the center then bring all points that have been hole punched to the center so they overlap. Place the pin through the each hole and through the wooden dowel.
- Pop the painted cork on the end with the pin and watch it shimmer in the wind but make sure the little ones can’t get to it because of all the small pieces!