Denim DIY lunch bag
You don’t need expert sewing prowess—if you own a sewing machine and know how to turn it on, then you have all the skills you need to make this DIY lunch bag craft.
After making cutoffs out of worn-out blue jeans, use the pant legs for this craft so the kids have a brand-new lunch bag for camp or school! With inexpensive iron-on letters and decorative patches from your local craft store, this DIY will be personalized in a jiff.
Although the Velcro tape we used to hold the bag shut is already adhesive, using fabric glue will ensure that the Velcro stays put. When the lunch bag gets grimy (as they often do), simply turn it inside-out then throw it in the wash. Crafty and functional—love it!
This post includes links to purchase items you’ll need from our affiliates.
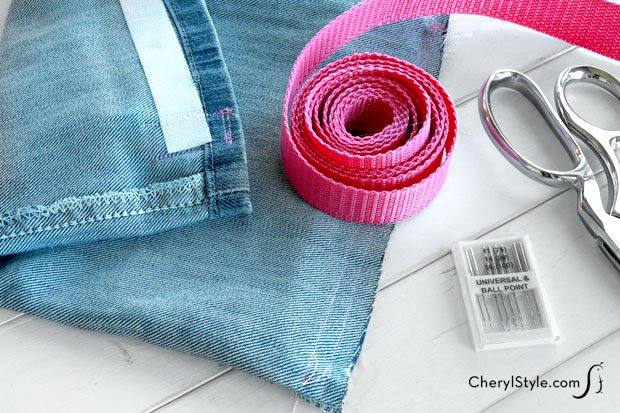
- [url href=”http://www.amazon.com/gp/product/B00168A08C/ref=as_li_qf_sp_asin_il_tl?ie=UTF8&camp=1789&creative=9325&creativeASIN=B00168A08C&linkCode=as2&tag=chery01-20″ target=”_blank” title=”Fabric Scissors”]fabric scissors[/url]
- retired blue jeans, preferably not a tapered leg
- sewing machine
- thread
- 0.75″ wide [url href=”http://www.amazon.com/gp/product/B00006RSWV/ref=as_li_qf_sp_asin_il_tl?ie=UTF8&camp=1789&creative=9325&creativeASIN=B00006RSWV&linkCode=as2&tag=chery01-20″ target=”_blank” title=”Velcro Tape”]Velcro tape[/url]
- [url href=”http://www.amazon.com/gp/product/B00178QSE6/ref=as_li_qf_sp_asin_il_tl?ie=UTF8&camp=1789&creative=9325&creativeASIN=B00178QSE6&linkCode=as2&tag=chery01-20″ target=”_blank” title=”Fabric Glue”]fabric glue[/url]
- iron-on letters
- cotton press cloth
- decorative iron-on patch
- iron
- 12″ x 1″ wide [url href=”http://www.amazon.com/gp/product/B001R301Y4/ref=as_li_qf_sp_asin_il_tl?ie=UTF8&camp=1789&creative=9325&creativeASIN=B001R301Y4&linkCode=as2&tag=chery01-20″ target=”_blank” title=”Nylon Heavy Webbing”]nylon heavy webbing[/url]
- matches
- Using fabric scissors, cut jeans across the leg 12″ from the ankle seam. Turn the fabric inside out. Leaving a ¼” seam allowance, sew the trimmed edges together with a sewing machine. Turn the fabric inside out once more, so that the finished side of the denim is facing outward and the ankle seam of the fabric is right side up.
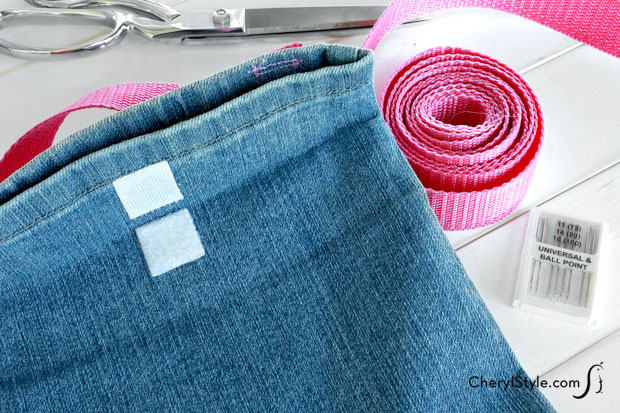
- Using scissors, cut a 5.5″ strip of Velcro tape. Separate the two pieces of Velcro then apply fabric glue to the adhesive backing to ensure the Velcro stays secure. Align and secure the Velcro strips just inside the mouth of the lunch sack then set aside to dry.
- When dry, fold the opening of the lunch bag over so the crease is about 1.5″. Cut a 3/4″ square of Velcro tape, separate the two pieces then apply fabric glue to the adhesive side of the tape. Place the Velcro squares on the interior fold of the bag. Set aside to dry.
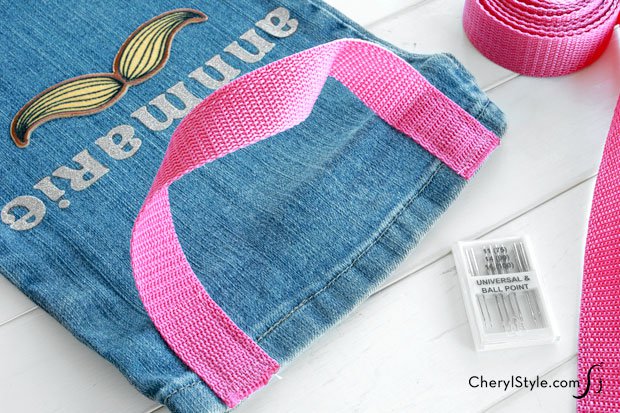
- On the front of the lunch bag, spell your child’s name or a fun phrase using iron-on letters. Cover the letters with a cotton press cloth then apply steady pressure with a heated iron for 20–30 seconds. Remove the press cloth then set bag aside, laying flat to cool.
- Place the decorative patch where desired and follow the same directions as with the iron-on letters.
- Lastly, gently melt the edges of the nylon heavy webbing with a match to prevent fraying. Sew a strap onto the lip of the freshly minted lunch bag—then it’s time to make that bologna sandwich!