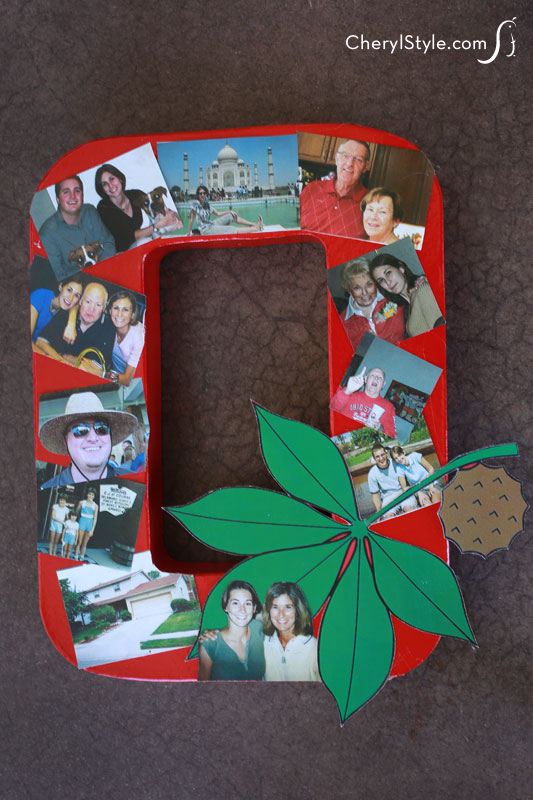
Photo collage letters
Photo collage letters are the perfect one-of-a-kind graduation gift that’s sure to be appreciated by your grad. Choose photos and paper mache letters to represent your student’s name, initials or school letters, then display them at their grad party and hang ‘em up in their new dorm room.
Choose photos of friends and family, logos from favorite bands, restaurants and vacation spots. Make it fun and let it tell a story so new friends will learn a little bit about them and so they take a little bit of home with them.
Thank goodness for digital photos! You can print out photos on regular paper and size them however you want to fit on the letters. Do the initial layout then hot glue each photo in place. Add a school logo or mascot from the web then load up each letter or place just a few pictures here and there—whatever you think they’ll like.
When it comes to hanging these letters, remember that most dorms don’t allow traditional hanging hardware. Use self-adhesive hooks to avoid any wall damage (and getting in trouble).
This is a really fun gift to make, give or receive and can work for any occasion. One glance and the memories of time spent with family and friends will return in a heartbeat.
- 11″ paper mache letters (school or grad’s initials)
- Phillips head screwdriver
- spray paint
- digital photos sized 2″ x 2″ and 2″ x 3″
- digital school logo or mascot (optional)
- scissors
- hot glue gun and glue
- X-acto knife
- Mod Podge clear acrylic sealer
- self-adhesive hanging hooks
- Turn each letter over to punch a hole in the center of the top for hanging, using a screwdriver. Flip them back over then spray paint each in school colors—you’ll want to do it in a well-ventilated area. Once painted, allow them to dry.
- Select, print and cut out digital photos on regular paper (we varied our sizes for more interest). Position photos on each letter as desired, creating layers occasionally. Any excess will be trimmed after gluing.
- Once you are satisfied with your arrangement, grab your hot glue gun and dab a small amount to the back of each photo one at a time then smooth to adhere (you can also use self-adhesive photo mounts from scrapbooking supplies). Make sure to glue any photos on the bottom layer first.
- When all photos have been glued, flip each letter over and carefully trim away any excess edges, using an X-acto knife.
- Once the letters have been trimmed, flip them over again and seal them using Mod Podge clear acrylic sealer then allow to dry overnight.