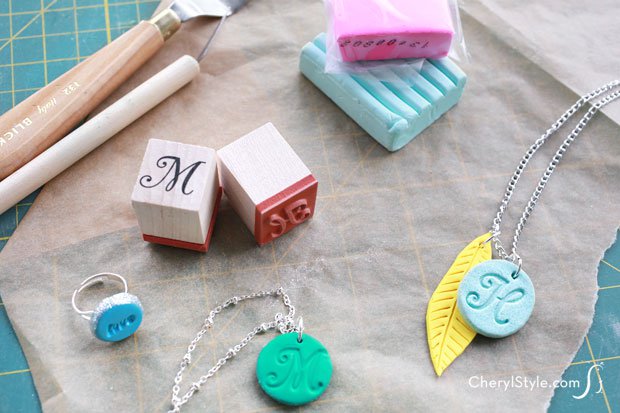
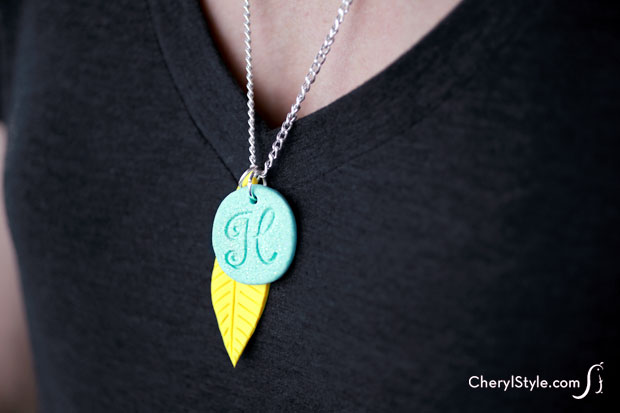
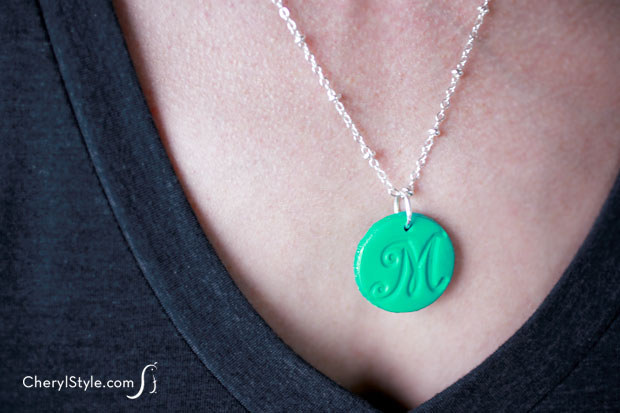
DIY polymer clay jewelry
DIY polymer clay jewelry is easy to make and you don’t have to be an artist to make them look professional. Stamps will take care of that!
When handling clay, keep a few tips in mind. First, you’ll want to keep your work surface and hands clean, especially when using more than one color of clay.
To make the clay ready for starting this or any project, play with it! The warmth of your hands will make it more pliable and easier to flatten or shape.
Once you’ve conquered making jewelry, try creating key chains, ornaments or even bowls. Get the kids involved and you’ll have a fun family project.
This post includes links to purchase items you’ll need from our affiliates.
DIY polymer clay jewelry instructions
Ingredients
- [url href=”http://www.amazon.com/gp/product/B00KC0FS14/ref=as_li_qf_sp_asin_il_tl?ie=UTF8&camp=1789&creative=9325&creativeASIN=B00KC0FS14&linkCode=as2&tag=chery01-20&linkId=TD3OMNRNIT5TET7F” target=”_blank” rel=”nofollow” title=”Polymer Clay”]polymer clay[/url]
- X-acto knife or clay tools
- [url href=”http://shop.hobbylobby.com/products/upper-case-brush-alphabet-wood-stamp-set-256743/” target=”_blank” rel=”nofollow” title=”Stamps”]stamps[/url]
- necklace chain and jump rings OR [url href=”http://www.amazon.com/gp/product/B009LIOJCW/ref=as_li_qf_sp_asin_il_tl?ie=UTF8&camp=1789&creative=9325&creativeASIN=B009LIOJCW&linkCode=as2&tag=chery01-20″ target=”_blank” rel=”nofollow” title=”Ring Blanks”]ring blanks[/url]
- water/soda bottle lids to use as shape cutters
- industrial-strength glue (for rings)
- wax paper
- baking sheet
Instructions
- First, wash your hands and clean your work surface. Using an X-acto knife, cut a small piece of clay about the size of a grape. Roll it in your hands to form a ball.
- Place the ball onto your work surface and flatten using something such as a hardcover book.
- Place a small round lid over the flattened clay and press firmly as you would a cookie cutter. Remove and trim away excess clay.
- Stamp clay using a letter stamp. Make a hole in the top center using a nail or awl, if you’re making the necklace. Smooth out any imperfections with fingers.
- Place the object on a wax-covered baking sheet and allow it to harden in the oven at 230 degrees for a maximum of 30 minutes. FIMO will completely harden when cooled down to room temperature.
- Once cooled, add jump ring to the pendent and attach chain.
- If mounting your clay cutout onto a ring, simply apply a dab of industrial-strength glue.
Notes
Don’t forget to make a hole at the top of your clay cutout if it’s going to hang. Once baked, it’ll be too late!