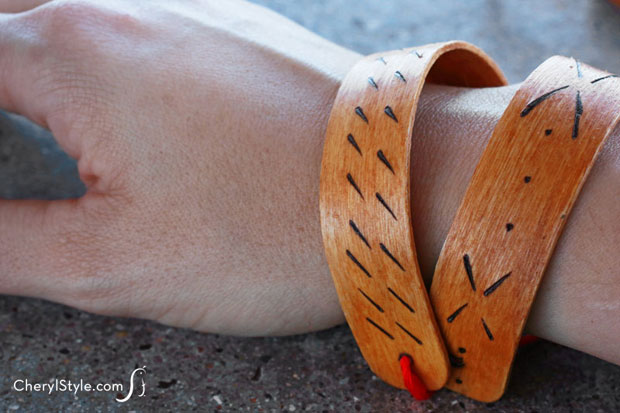
Inexpensive craft stick bracelets
Handmade jewelry doesn’t always have to be made of metal or be expensive. Try these craft stick bracelets for something a little different! A wood burner is easy to use to create your own awesome designs.
Although easy, this project demands a little patience and some waiting time. You can check on its progress while you still accomplish your schedule’s demands. Just resist the temptation to bend the craft sticks as they soak in hot water—it’s better just to wait it out until they’re pliable.
It takes a bit of practice to gently bend the sticks into curved shapes. However, craft sticks literally cost pennies so you can afford to break a few along the way. Once inserted inside coffee mugs and left overnight to dry, the sticks will maintain their shape.
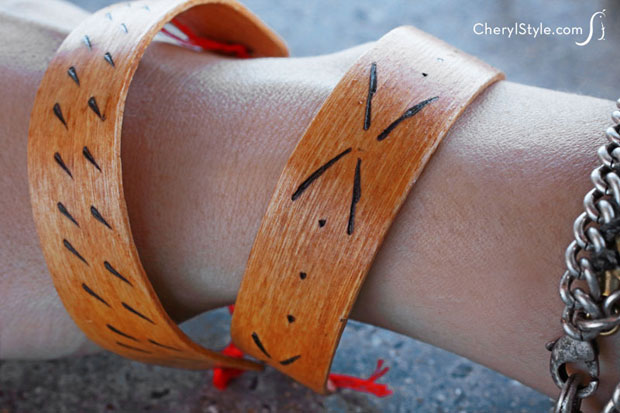
Other craft bracelets have been painted or wrapped in thread, but wood burning gives them a custom and more unique look.
This post includes links to purchase items you’ll need from our affiliates.
- 6″ jumbo craft sticks
- wood burner
- 8″ x 8″ baking pan
- saucepan for boiling water
- eating utensil
- small mugs or drinking glasses
- stain
- 2 disposable brushes
- cloth
- Mod Podge
- First, decide how many bracelets you’d like to make then plug in your wood burning tool to get hot (you’ll want to protect your work surface as a precaution).
- Once the wood burner is hot, practice burning the designs you have in mind on a few extra craft sticks. Once you’ve got the knack of it and are pleased with the results, you’re ready to try it on the ones you’re going to make into bracelets.
- After your designs are burned on, flip each craft stick over and burn a hole at each end—it should be large enough for a narrow string to fit through it.
- Place the craft sticks in the baking dish, boil hot water in a saucepan then pour the water carefully into the baking dish. The craft sticks will float, so place a fork or other utensil on them to weigh them down.
- Allow the craft sticks to soak for 30−40 minutes. Remove 1 with a utensil to test for pliability by carefully applying pressure starting at one end and working your way around to the other. If it feels as if it is going to split, STOP! It most likely will need another soaking. Replace the cool water with boiling water as necessary then test again until the craft sticks are able to bend more easily with pressure.
- Carefully bend 1 craft stick to form a curved shape as described then gently force it inside a small mug or drinking glass to hold its shape. Repeat for each of the remaining craft sticks and allow them to dry overnight.
- Once dry, remove them from the mugs and brush on a stain of your choice. Wipe away any excess using a cloth, allow them to dry completely and apply Mod Podge with a clean brush. Thread string through each hole and tie to wear.