DIY utensil caddy
This DIY utensil caddy is perfect for outdoor entertaining! You can use it to easily carry all of your utensils outside to set the table or you can park it on the buffet next to the food and have everyone serve themselves.
With the exception of a small wooden crate and some balsa wood (which can easily be purchased from your local craft store) you probably have most of what you need on hand.
We always have plenty of materials left over from various projects, so finding a scrap ¾” board as the napkin divider wasn’t too difficult. Now cutting thick wood can be another story if you don’t have the proper tools or the muscle to do it. Don’t be afraid to go to your local home improvement store and ask them to cut your wood for you. Most are happy to help out and you’ll probably need to buy something anyway!
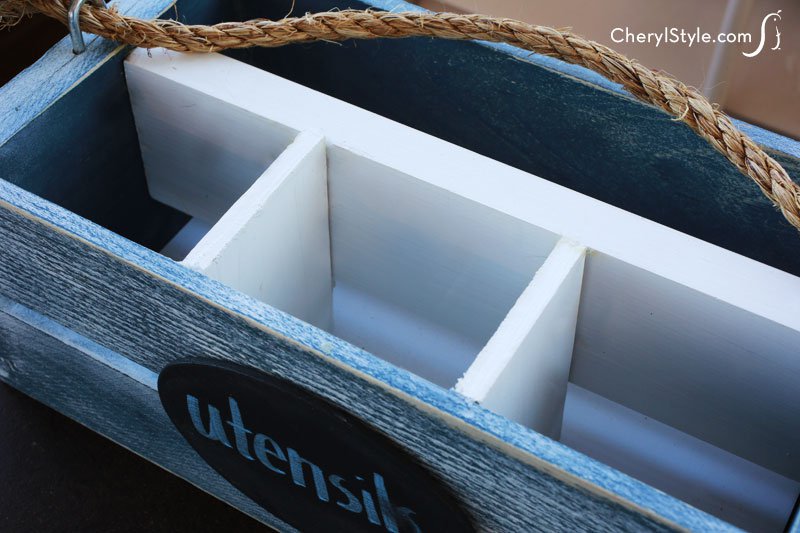
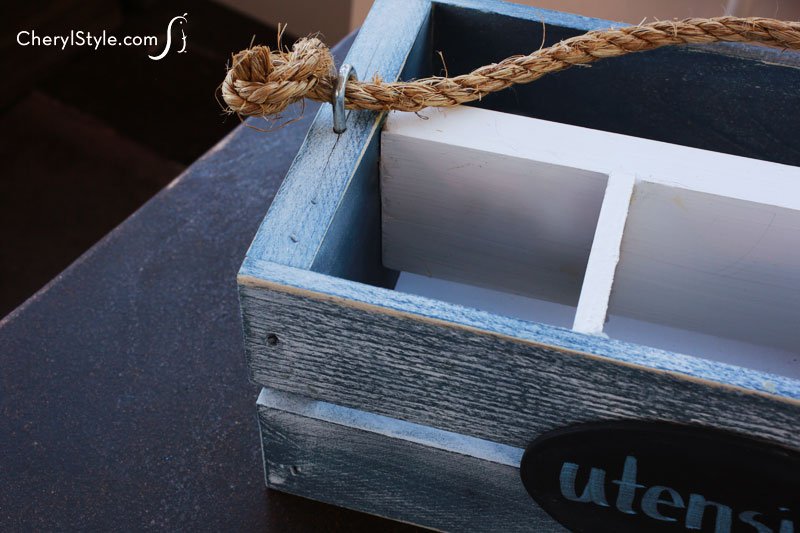
After you have everything you need, you can paint it to match your style. We gave our caddy a weathered denim look by painting it solid blue, then lightly spraying it with a white overcoat of paint. Then we sanded it down for the weathered effect. If contemporary is more your style, use a high gloss spray instead—just make sure to use an indoor/outdoor paint.
- 9½” x 5″ unfinished wooden crate
- flat interior/exterior indigo spray paint
- flat interior/exterior white spray paint
- medium grit sandpaper
- ruler and pencil
- X-acto knife
- white foam board
- 1 – 9⅝” x ¾” x 2½” board, measured and cut (as napkin divider)
- 2 – 3¾” x ¼” x 2½” pieces of balsa wood, measured and cut (as utensil dividers)
- hot glue gun and glue
- 2 – ¾” galvanized staples
- hammer
- rope for handle
- First, spray paint your wooden crate—make sure it has a flat or matte finish. Allow it to dry then lightly spray white paint over it in small areas. Once dry, sand to give it a weathered look.
- Measure and cut white foam board to fit inside the bottom of your crate. This will line the bottom, creating a level base. (Our crate had spaces in between the wood and without the liner, our utensils would have fallen out!) Insert the foam board into the bottom of the crate.
- Next, cut your dividers using a handsaw. The balsa wood is thin enough to be cut easily, but you’ll need some muscle to cut the longer and thicker board. (If you’re a little intimidated, ask a salesperson at your local home improvement store to do it for you at the store cutting station.)
- Spray paint the dividers with white paint and allow them to dry.
- Line up dividers inside the crate so they are even with the top edges of the crate to make sure they’ll fit correctly. The thick napkin divider should be placed 1⅓” from the inside edge of the crate (don’t worry if it doesn’t reach the bottom of the crate). The balsa wood pieces should be spaced approximately 3¼” apart to create 3 sections for utensils.
- Remove all dividers, apply hot glue to only the ends of the napkin divider and wedge it back into place, applying pressure until it’s secure. Apply glue to the sides and bottom edge of the utensil dividers and repeat the same process.
- Create the handle by hammering a galvanized staple into the center edge of each end of the crate, thread a rope through and secure tightly with knots.
- Hot glue a chalk paint tag on the front or decorate with other embellishments. Place napkins and plastic tableware in your caddy then call your guests to come and get it!