Decorated Bobby Pins
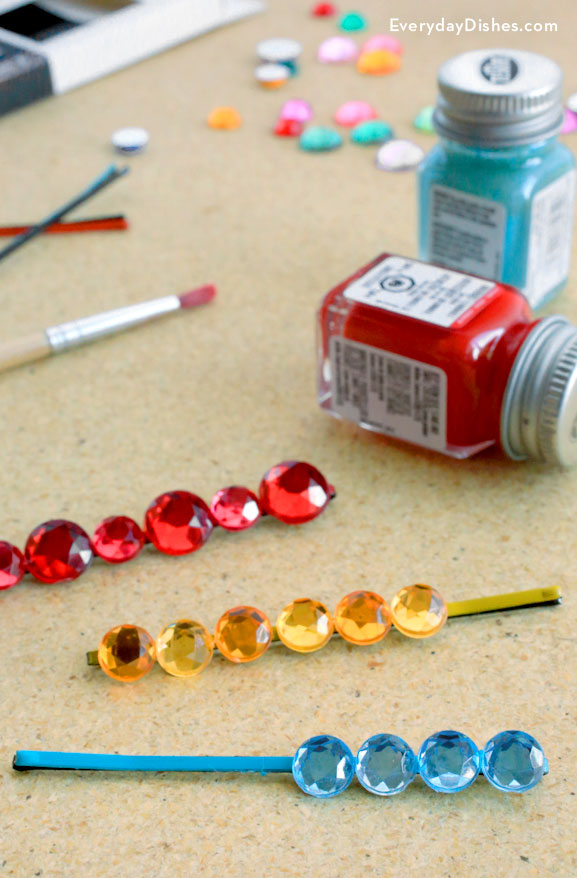
Enamel paint, colored gemstones and hot glue are all you need to make decorated bobby pins a colorful accessory to match any outfit. Make a batch all at once—you only need to paint the front of each pin, as that’s all that will be visible.
Enamel takes longer to dry completely so we did our painting the day before. Of course, you can skip the painting altogether and buy colored bobby pins but they may be hard to find in small packs and are more expensive.
It takes longer to heat up your glue gun than it does to adhere the gemstones onto the bobby pin! Hot glue dries very quickly so you’ll want to plan your design and have your gemstones lined up ready to go.
These hairpins are fun, super quick to make and have endless design possibilities. They won’t last forever but then again, they cost pennies to make.
As always, with any project involving small pieces, they are not appropriate for children under three years of age.
How to make decorated bobby pins
- bobby pins
- scrap cardboard or chipboard
- enamel paint and paintbrush
- gemstones
- hot glue gun
- long tweezers
- Slide bobby pins onto a scrap of a very thin piece of cardboard, chipboard or the packaging in which it came. Paint the front of each pin with the desired color of enamel paint and allow it to dry completely.
- While still on the cardboard, start near the bend in the bobby pin and apply a very tiny dab of glue. Press the first gemstone firmly in place until it adheres then move the pin around a little bit to make sure the glue doesn’t stick to the cardboard! Remove any stray strands of excess glue with tweezers.
- Repeat until your design has been completed and only the curved end of the bobby pin is exposed. Your new accessory is ready to go!