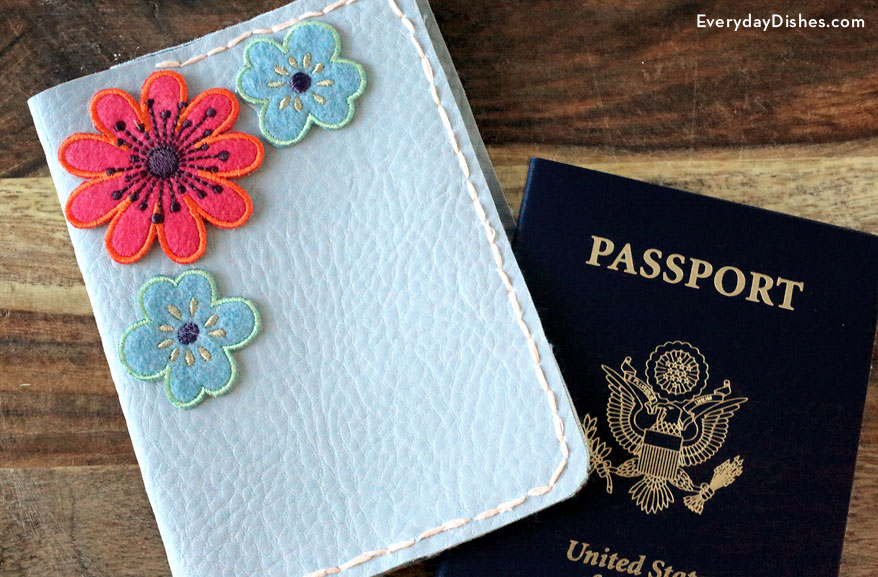
Passport Holder
Regardless if you’re planning a trip abroad or simply looking to store important IDs all in one place, our DIY passport holder is easy and fun to make!
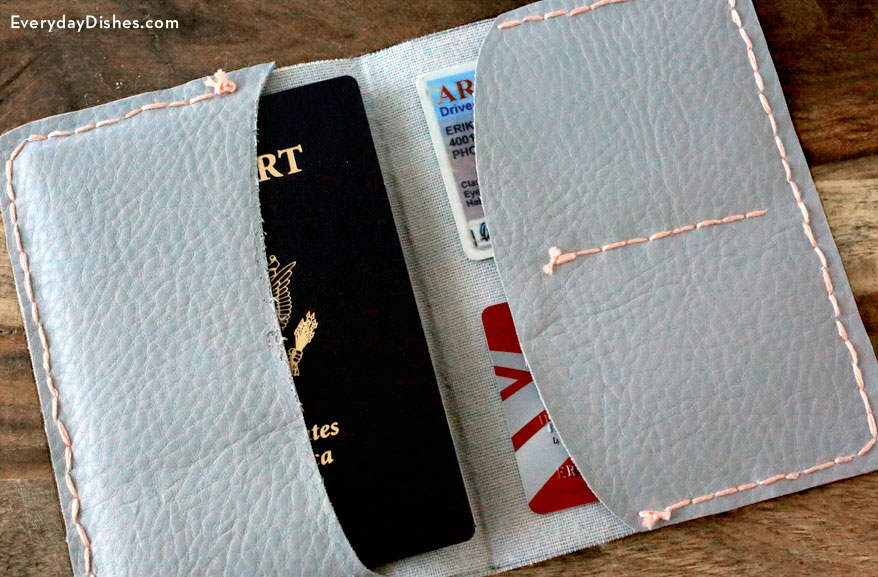
We can’t tell you how many times we’ve used a cute laptop case as a clutch, and a regular passport holder as a wallet—even if you don’t have a passport handy, this craft can hold a driver’s license and a debit card, along with important receipts, sticky notes and beyond.
If you’re making one for yourself, you might as well make a few extra, because all your friends are going to want one too—they make great gifts for birthdays, holidays—and, of course, a bon-voyage party!
This post includes links to purchase items you’ll need from our affiliates.
How to make a passport holder
How to Make a Passport Holder
Ingredients
- passport holder template
- scissors
- 12″ x 12″ piece faux leather
- ballpoint pen
- awl for sewing products
- cutting mat (optional)
- 1 pkg 6-strand embroidery floss
- 1 embroidery needle
- embellishments, if desired
- [url href=”http://www.amazon.com/gp/product/B004BPHQWU/ref=as_li_qf_sp_asin_il_tl?ie=UTF8&camp=1789&creative=9325&creativeASIN=B004BPHQWU&linkCode=as2&tag=chery01-20&linkId=C7IJAUQVMSVPVI32″ target=”_blank” title=”E6000″]industrial-strength glue[/url] for embellishments (optional)
Instructions
- Download the [url href=”https://everydaydishes.com/wp-content/uploads/2015/03/passport-holder-template-everydaydishes_com.pdf” target=”_blank” title=”DIY passport holder template”]passport holder template[/url] and open in [url href=”http://get.adobe.com/reader/otherversions/” target=”_blank” title=”Adobe Reader”]Adobe Reader[/url] then cut out the pattern using scissors.
- Place pattern pieces on the unfinished side of the faux leather then trace using a ballpoint pen. Set pattern pieces aside then cut out the traced shapes using scissors.
- Align pattern shapes on top of corresponding pieces of faux leather, then punch holes along the dotted lines using the awl.
- Next, cut three lengths of embroidery thread. You will need two 50″ pieces of embroidery floss for the exterior, and a 25″ piece for the credit card divider.
- Stitch pieces together using a simple running stitch using the pre-punched holes as your guide.
- Repeat on the ‘credit card’ side of the pocket using the long thread for the edge, then the short piece of thread for the credit card divider.
- If you wish to add embellishments, attach to the exterior of the passport cover using industrial-strength glue, then set aside to dry.
- Once dry, insert your passport and corresponding cards—arrivederci!
Notes
If you have a cutting mat, use that as your surface while punching holes with the awl. Otherwise a phone book or newspaper will do the trick!