Christmas Tree Advent Calendar
If you can swing a hammer and paint, you can definitely make our DIY advent calendar. Don’t worry about being an expert carpenter—your local hardware store will gladly cut your wood to size. With a little planning and some double-sided tape, you’ll be filling bags with treats in no time!
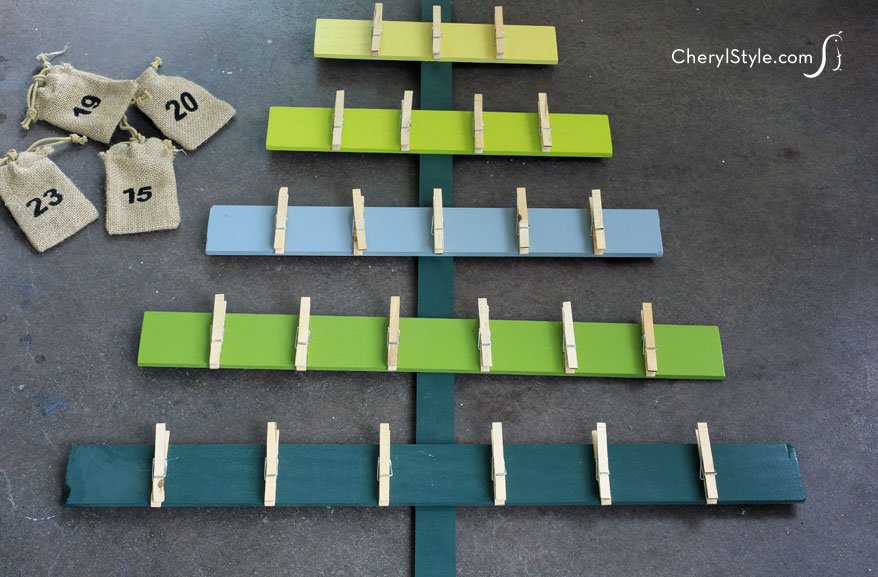
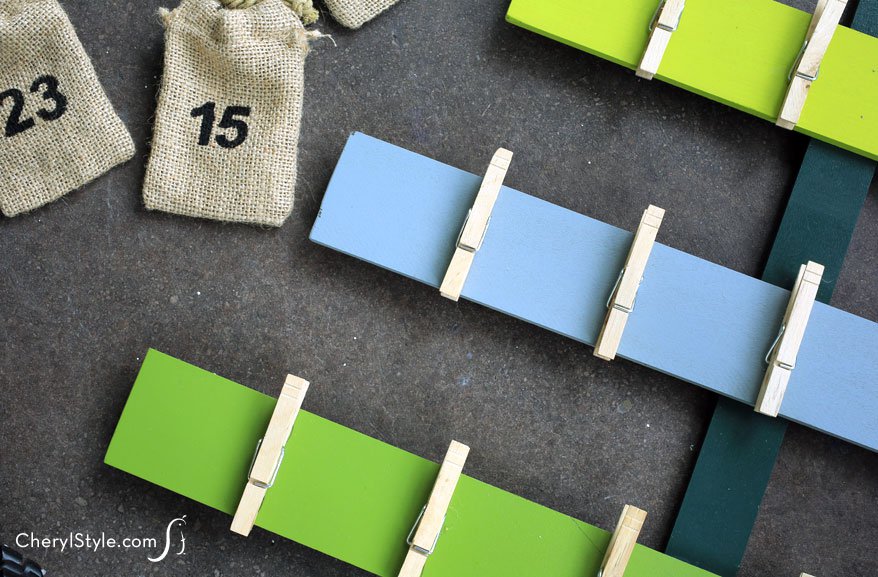
We’ve used burlap bags, but paper bags can easily be substituted. Stencil numbers on the front of the bags for the daily countdown and hang them from the boards using clothespins. If you want a more rustic look, leave the boards unfinished and paint the clothespins instead. Either way, it’s going to look great filled with candy canes, sweets or gift cards.
Christmas tree advent calendar instructions
DIY Advent Calendar Instructions
Ingredients
- 1- .25″ x 2″ x 36″ poplar hobby board (tree “trunk”)
- 3- .25″ x 3″ x 48″ poplar hobby boards (tree “branches”)
- paint (spray paint or cans of house paint)
- saw tooth hanger
- ruler and pencil
- wood glue
- hammer
- ⅝” wire nails
- 24 clothespins
- 24 − [url href=”http://www.amazon.com/gp/product/B00AGYHCFG/ref=as_li_qf_sp_asin_il_tl?ie=UTF8&camp=1789&creative=9325&creativeASIN=B00AGYHCFG&linkCode=as2&tag=chery01-20″ target=”_blank” title=”Burlap Bags”]3″ x 5″ burlap bags[/url]
- 2″ number stencils
- black acrylic paint
- stencil or stipple brush
- paper towels
Instructions
tree
- Attach a saw tooth hanger to the top back of the 36″ board (tree trunk) to use for hanging.
- Cut the 48″ hobby boards into 5 different pieces with the following measurements: 12″, 16″, 20″, 24″ and 28″ Then mark the center of each board using a pencil. This will be the back of the boards.
- Paint the front sides and ends of all the boards. Use different colors for visual interest. Let the paint dry and apply another coat if needed.
- Once the boards are completely dry, turn them over, paint side down on a hard surface. Use a towel or rags to set your boards on so you don’t scratch up the fresh paint. Place the 5 cut boards (tree branches) 3 ½” apart so they are parallel to each other the center marks line up.
- Place small amount of wood glue onto the center mark of each board then adhere the 36″ board, paint side down, across the center of the 5 boards. Nail in place using 2 nails per board.
- Turn your tree over and mark (with a pencil) where you will glue the clothespins to hold the bags. Place 3 on the top board, 4 on the next board, 5 on the middle board and 6 on the two bottom boards. Glue each clothespin in place.
bags
- Lay bags out on a hard, covered surface. Place stencil on the bag. Pour a small amount of paint into a bowl, dip stencil brush in paint and dab excess off onto paper towel.
- Hold stencil in place with one hand and begin painting in a tapping motion. To achieve best stenciling results, tap stencil brush on fabric in an up and down tapping motion. Be cautious when removing the stencil so you don’t smear the paint.
- Wipe stencil clean with a damp paper towel to remove excess paint and move to the next bag to stencil.
- Fill with goodies and hang bags by clothespins. Then let the kiddos count down the days to Christmas!
Notes
If you don’t want to use this craft for an advent calendar, it is perfect for displaying your holiday cards! Use an ornament for a tree topper for added decoration.