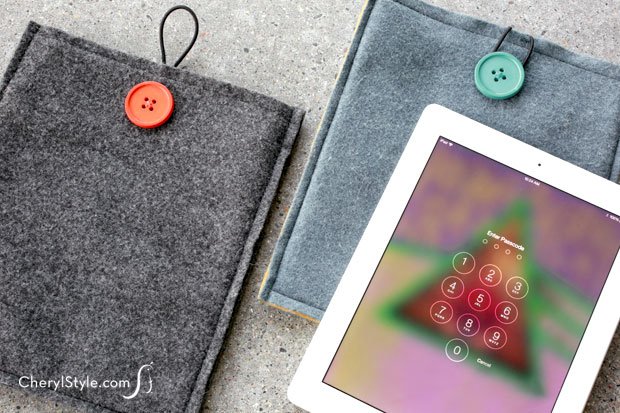
Felt iPad Sleeve
You don’t have to spend a lot of money to protect your iPad—it costs enough all by itself! We made a felt iPad sleeve for only a few dollars. Plus, when you make your own, you can personalize it any way you’d like.
Choose your favorite colors and any other embellishments you want to add. If you have a reader or a tablet, simply adjust the measurements of the felt accordingly.
Instructions call for a sewing machine but it can easily be hand-stitched using a simple blanket stitch. Just be sure to measure and cut the felt before you begin to sew.
This post includes links to purchase items you’ll need from our affiliates.
How to make a felt iPad sleeve that’s stylish and inexpensive
DIY felt iPad sleeve instructions
Ingredients
- 4 – 9″ x 12″ [url href=”http://www.amazon.com/gp/product/B001B4E4L0/ref=as_li_qf_sp_asin_il_tl?ie=UTF8&camp=1789&creative=9325&creativeASIN=B001B4E4L0&linkCode=as2&tag=chery01-20″ target=”_blank” title=”Craft Felt Sheets”]craft felt sheets[/url]
- sewing pins
- 7″ of [url href=”http://www.amazon.com/gp/product/B002XNQOV6/ref=as_li_qf_sp_asin_il_tl?ie=UTF8&camp=1789&creative=9325&creativeASIN=B002XNQOV6&linkCode=as2&tag=chery01-20″ target=”_blank” title=”Round Elastic Cord”]round elastic cord[/url]
- button
- needle and thread
- other embellishments, if desired
- rotary cutter, straight edge and cutting mat, or pinking shears
Instructions
- Measure your sleeve by sandwiching your iPad between 4 sheets of felt (2 on each side of the device).
- Pin 2 felt sheets together at the top. Fold the elastic cord in half and insert between the 2 sheets (about 1″ deep). Pin the cord in several spots to keep it in place. Sew (or [url href=”https://everydaydishes.com/creative-crafts/how-to-sew-a-blanket-stitch-diy/” target=”_blank” title=”Blanket Stitch Video”]blanket stitch[/url]) across the top with a sewing machine, being careful when sewing over the cord, as it has a tendency to roll.
- Pin the remaining 2 felt sheets together at the top then sew across with a sewing machine.
- Pin the 4 felt sheets together on the sides and bottom. Use your iPad to measure the fit—you don’t want it to be too tight.
- Sew each side of the sleeve then sew the bottom.
- Trim the sides and bottom with a straight edge and rotary cutter to produce a precise cut. If you don’t have one, use pinking shears to trim the sides and bottom—you won’t have to be so exact and it would add a playful touch to your sleeve!
- Fold the elastic cord over to the front and note where the button should be. Sew button in place, add any additional embellishments as desired then insert your iPad and enjoy!
Notes
Don’t worry if you don’t have a rotary cutter. Pinking shears will get the job done and look great!