DIY shadow box drawer
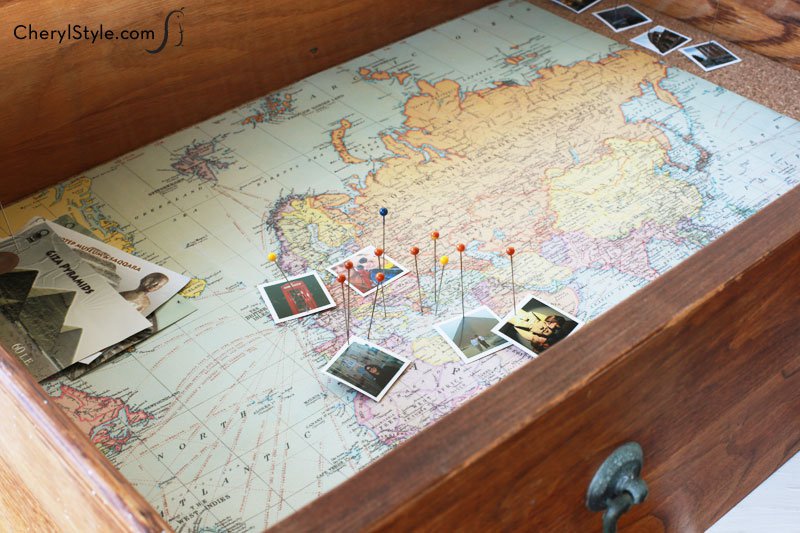
If you’re a traveler, don’t hide your souvenirs in a scrapbook. Show them off with our DIY shadow box drawer! A cork-lined drawer with a map insert makes it easy to mark where your travels have taken you and there’s plenty of room to display your collection of treasures.
Upcycle a kitchen drawer from a remodeling project or check out local yard sales and thrift shops. Old drawers average about five bucks and come in a variety of styles and finishes to suit your taste.
Like the look of old paint? Keep it as-is but clean it up with soap and water. If you’re unsure if it’s lead-based (after all, we’re talking ‘old’ here), don’t sand it—just paint right over it.
Feel daring and want to try a new type of finish? Here’s your chance to experiment with new techniques. You really can’t botch it up—you can always paint right over it and try something else.
A shadow box drawer is so much more versatile than an ordinary shadow box. It can be customized to fit your décor, has room to display unusual memorabilia, shows your friends where you’ve been, and is super inexpensive, which we always love to hear!
- dresser drawer or kitchen drawer
- wood putty (if needed)
- paint (optional)
- roll of cork
- pencil
- ruler
- utility knife
- E-3000 Adhesive
- map
- X-acto knife
- white craft glue and wood craft stick
- sawtooth hangers and nails
- knobs or drawer pulls (optional)
- pins
- photos and travel memorabilia
- Wipe down the interior and exterior of your drawer and remove any hardware you won’t be using (like drawer pulls or drawer slides). Then fill any holes or imperfections with wood putty. Follow the instructions on the wood putty for how long it needs to cure before you can sand it. CAUTION: if you are working with painted drawers and you aren’t certain what kind paint was used, treat it as lead-based paint and DO NOT sand the paint—paint it over instead.
- Now it’s time to paint! If you haven’t had to use putty to fill the holes, you may consider keeping the original worn paint or stained surface. But if you want to try a new painting technique, now is the time to try it out! Just follow the package directions before you get going so you get the look you want.
- Once the drawer is ready to go, trace the drawer opening onto the roll of cork then use a ruler and utility knife to cut the cork to fit. Place the cork in the bottom of the drawer and see where you may need to do some trimming.
- Once you have the cork trimmed to fit, use it as a template, trace your map and cut it to the same size using an X-acto knife.
- Next, dab some E-3000 along the bottom of the drawer and adhere the cork to the bottom of the drawer. You can use cans or jars to weigh the cork down and keep it flat while the glue dries.
- After the cork is set, dab white craft glue on top of the cork, spreading the glue out evenly with a wood craft stick so you get a good flat surface. Then place the map on top of the cork and use the same cans and jars to hold the map in place while the craft glue dries.
- After your glue has dried, flip your drawer over and attach 2 sawtooth hangers to the back. You really want to use 2 hangers so your drawer stays in one place and doesn’t shift once hung (and so your memorabilia doesn’t shift, either).
- Now you get to decorate! Cut small photos and pin them on the cities and countries you have visited. Pin other memorabilia (tickets, money, coins, etc.) on the map, too.
- Choose a spot to hang your drawer and then use the bottom as a shelf to display travel memorabilia (bottles of sand, small figurines, etc.)