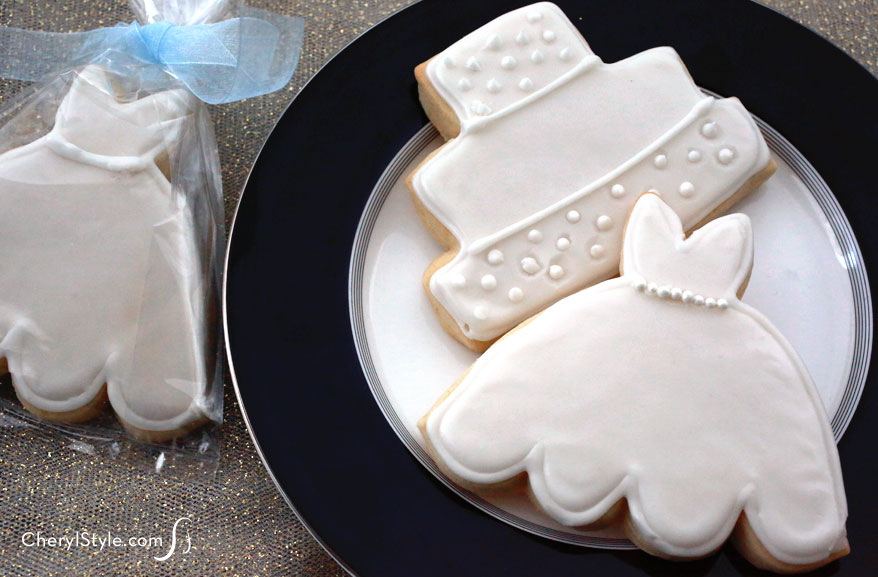
DIY wedding cookie cutters
Looking for wedding cookie cutters but can’t find exactly what you want? We made templates so you can make your own wedding cookie cutters.
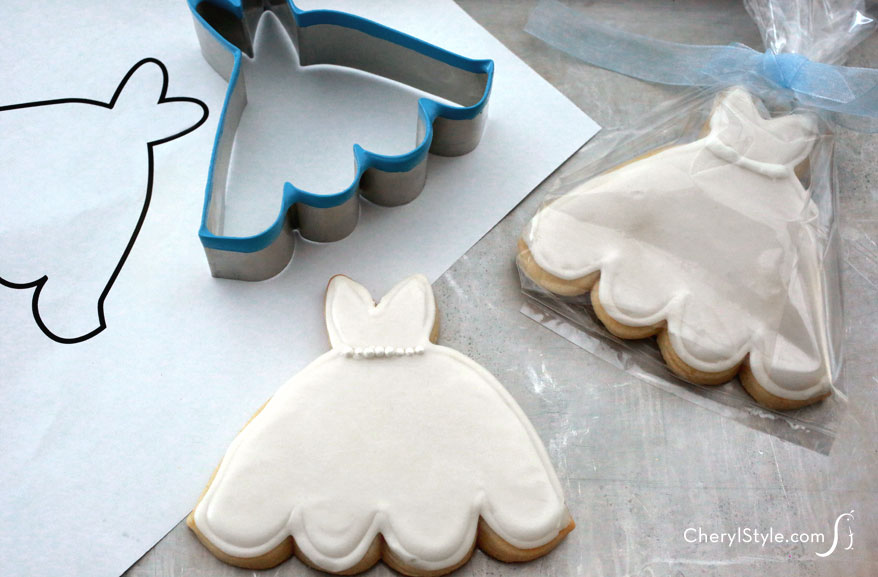
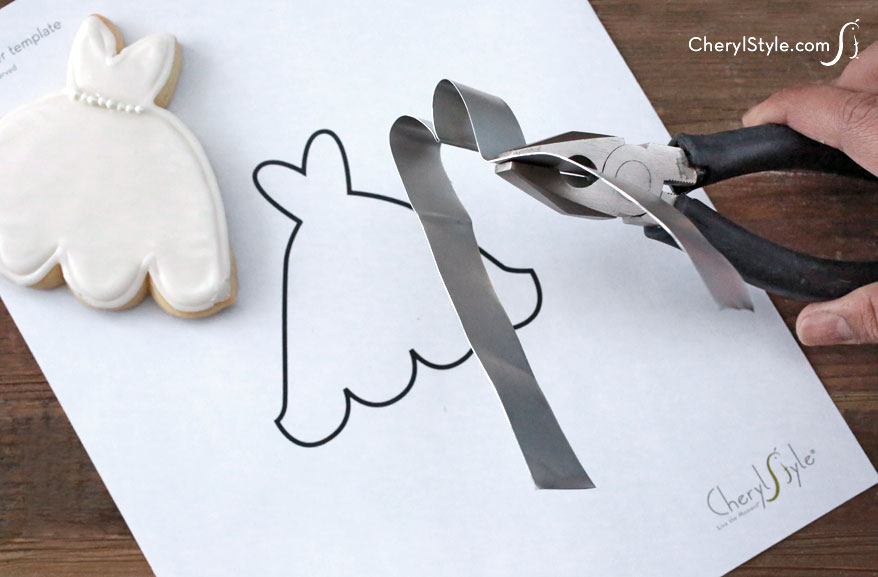
Get started with our three printables—they’re perfect for a bridal shower. Use ordinary scissors to cut strips of craft metal that are flexible and can easily be shaped. Make curves or sharp edges with the help of a marker and needle-nose pliers.
The edges can be sharp so we suggest dipping them in plastic coating as a final step. You’ll have to wait a bit longer for them to dry but they’ll be more user-friendly.
This post includes links to purchase items you’ll need from our affiliates.
how to make wedding cookie cutters
Ingredients
- [url href=”https://everydaydishes.com/wp-content/uploads/2014/07/diy-wedding-cookie-cutters-cherylstyle-printable.pdf” target=”_blank” title=”Everyday Dishes & DIY Wedding Cookie Cutters Printable”]Everyday Dishes & DIY Cookie Cutter Printable[/url]
- marker and ruler
- [url href=”http://www.amazon.com/gp/product/B0006N6PTQ/ref=as_li_qf_sp_asin_il_tl?ie=UTF8&camp=1789&creative=9325&creativeASIN=B0006N6PTQ&linkCode=as2&tag=chery01-20&linkId=Q3RFKNF3ZBHU72HW” target=”_blank” title=”Aluminum Craft Metal”]aluminum craft metal[/url]
- scissors
- needle-nose pliers
- industrial-strength glue
- binder clips
- [url href=”http://www.amazon.com/gp/product/B000ZN1T16/ref=as_li_qf_sp_asin_il_tl?ie=UTF8&camp=1789&creative=9325&creativeASIN=B000ZN1T16&linkCode=as2&tag=chery01-20&linkId=CCM4CFIKLUXT2WCM” target=”_blank” title=”Plasti Dip”]rubber coating dip[/url] (optional)
Instructions
- Measure and cut 1″ x 18″ strips of aluminum, one for each cookie cutter—sharp scissors should work just fine.
- Download the [url href=”https://everydaydishes.com/wp-content/uploads/2014/07/diy-wedding-cookie-cutters-cherylstyle-printable.pdf” target=”_blank” title=”Everyday Dishes & DIY Wedding Cookie Cutters Printable”]Everyday Dishes & DIY Cookie Cutter Printable[/url] and open in [url href=”http://get.adobe.com/reader/otherversions/” target=”_blank” title=”Adobe Reader”]Adobe Reader[/url].
- Print out template, lay it on your work surface then follow the outline to shape the metal. For rounded areas, wrap around a thick or thin marker. For edges or angles that require a sharp fold, simply pinch with needle-nose pliers.
- Once you’ve completed the outline, leave half an inch for overlap. Snip off the excess metal then glue the two pieces together with industrial-strength glue. Hold in place with binder clips and allow it to dry for at least 3 hours if planning to dip the top edge into rubber coating.
- Let dry overnight and hand wash before using.
Notes
Craft metal costs about $10 per sheet. You can get up to 12 cookies from one sheet so it’s a bargain!