Easy DIY Marquee Sign
LOVE giving custom-made gifts for holidays and special events? Our DIY marquee sign is the perfect decoration for a wedding reception! Or, make it for yourself and use it as a photo prop or a sweet wall display.
You can even follow the same instruction to create signs with your favorite words like ‘live,’ ‘laugh,’ ‘joy’ or ‘smile.’
It’s a really impressive final product, but it can be a bit pricey. We paid about $35 for the letters and $30 for the string lights—but, it’ll last for a long time so you’ll get your money’s worth!
The letters that we used measured 15″. If you can’t find letters in that size, then be sure to measure out equal distances between each light bulb before drilling. The measurements in our instructions are for 15″ letters only.
Oh, and you’ll probably need an extension cord for the lights. Enjoy!
This post includes links to purchase items you’ll need from our affiliates.
How to make a DIY marquee sign
- 15″ canvas-covered wooden letters ([url href=”http://shop.hobbylobby.com/products/canvas-covered-wooden-letter-l-478669/” target=”_blank” title=”Canvas-covered wooden letter – L”]L[/url], [url href=”http://shop.hobbylobby.com/products/canvas-covered-wooden-letter-o-479204/” target=”_blank” title=”Canvas-covered wooden letter – O”]O[/url], [url href=”http://shop.hobbylobby.com/products/canvas-covered-wooden-letter-v-487645/” target=”_blank” title=”Canvas-covered wooden letter – V”]V[/url] and [url href=”http://shop.hobbylobby.com/products/canvas-covered-wooden-letter-e-474031/” target=”_blank” title=”Canvas-covered wooden letter – E”]E[/url])
- ruler and pencil
- ⅞” drill bit and drill
- precision knife or scissors
- gold spray paint
- 2 strings of [url href=”http://www.amazon.com/gp/product/B004RKEDKW/ref=as_li_qf_sp_asin_il_tl?ie=UTF8&camp=1789&creative=9325&creativeASIN=B004RKEDKW&linkCode=as2&tag=chery01-20&linkId=WCCHYUV3D63KL7FG” target=”_blank” title=”String lights”]25-count clear globe lights[/url]
- staple gun
- Remove any packaging labels or staples from the wooden letters and lay them onto a protected work surface. Beginning with the letter ‘L,’ draw a line down the center of the length and width to create a guide for the drill. Repeat with each letter.
- Using your ruler and pencil, make marks along the center guideline, spacing them equally apart—we used 15″ letters and spaced them 1¼” apart. The ‘L’ and ‘E’ should each have 12 holes and the ‘O’ and ‘V’ should each have 13 holes to total 50 holes—one for each light bulb.
- Remove the light bulbs from the string lights then measure the width of the plastic base in which the light bulbs screw. You can break off the clips that are usually attached to each base. Otherwise, be sure to include the clip in your measurement.
- Using your measurement (ours were 1″ wide), carefully drill a hole into the center of each pencil mark. Use the precision knife or scissors to trim any stray threads of canvas.
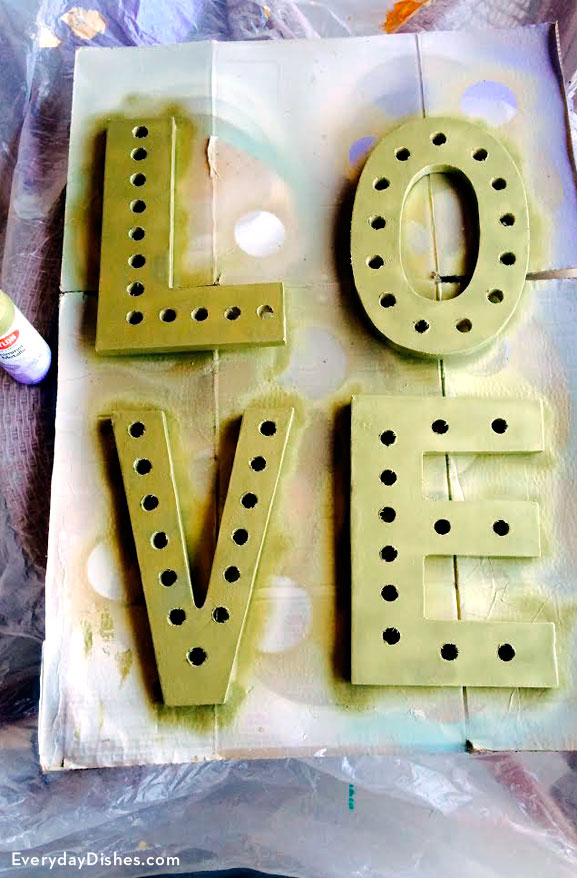
- Spray paint both sides of the letters and allow them to dry completely.
- Starting with the end closest to the plug on one light string, push the first plastic base through the top hole on the back of the ‘L.’ Continue down the length of the ‘L’ and ‘O.’ Connect the second set of lights to the first to finish stringing the ‘V’ and ‘E.’ The plug from the second string should end up at the bottom of the ‘E.’
- Place the marquee letters face down in a soft surface such as a pillow. Twist loose cords between each bulb and attach to the back using a staple gun to secure. Be sure not to shoot any staples through the cords or you could short your string lights!
- Once light strings are secure, flip letters right side up, screw bulbs into bases and then plug in.

