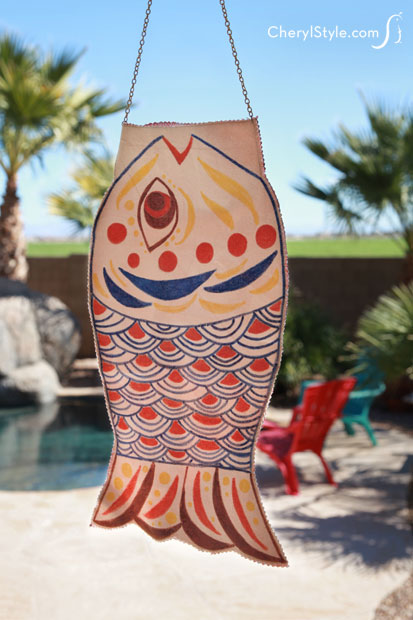
DIY fish windsock
This easy to make, no-sew DIY fish windsock is a fabulous warm-weather activity that you or the kids can make!
Set up a craft space inside or outdoors with all the supplies, then let the creativity begin! Because this DIY enlists the use of pinking shears and glue, you won’t have to fuss with sewing needles and sharp scissors. Hallelujah! It does not get any easier than using fabric glue to attach the front and back pieces of the windsock!
Let the kids cut their own patterns, then draw their best designs with inexpensive fabric markers or tackle a design yourself that complements the house. Securing the chain to the windsock will require a little adult supervision if the kids are involved—the awl has a pretty sharp tip—but the rest is fun and games!
When finished, you’ll have a beautiful totem to hang from the porch!
- [url href=”https://everydaydishes.com/wp-content/uploads/2014/02/no-sew-diy-fish-windsock-printable-cherylstyle.pdf” title=”DIY Fish Windsock Printable”]Everyday Dishes & DIY DIY windsock printable[/url]
- tape
- ½ yard natural canvas fabric, or similar
- ½ yard scrap fabric of your choice (this is for the back of the windsock)
- pencil
- scissors
- fabric markers
- pinking shears
- awl
- 2 large jump rings
- chain
- needle nose pliers (optional)
- Download and print the DIY windsock template and open it in [url href=”http://www.get.adobe.com/reader/otherversions/” target=”_blank” title=”Adobe Reader”]Adobe Reader[/url]
- Cut out each template using regular scissors, following along the dotted line, then connect the head and tail piece of the pattern by taping them together to form one body. If you want to make the windsock larger than the template, you can take it to a copier and have it printed to whatever size you prefer.
- Next, trace the pattern, using a pencil, on both the canvas and the scrap fabric.
- Using the fabric markers, draw designs of your choice on the canvas.
- Once you’ve finished drawing, cut the pattern out of both pieces of fabric using pinking shears.
- Once both pieces of fabric are cut, layer the pieces on top of each other, making sure the drawing side of the canvas and the front side of the fabric is facing out. Apply a thin layer of fabric glue to the outer edges of the body of the windsock to glue the two pieces of fabric together. Make sure not to glue the mouth and tail end.
- Set windsock aside for a few hours and allow the glue to dry. Once glue is completely dry, go over the edges again with fabric glue, to prevent fraying. Don’t worry, it will dry clear. Set aside and allow to dry for a few hours or as directed on your glue.
- When dry, punch two holes on both sides of the fish mouth using an awl. Guide the jump rings through the holes on each side, attaching the chain in the process. Use your fingers or needle nose pliers to clamp jump rings shut.
- Hang your windsock by a patio or porch and enjoy the colors flowing in the wind—but remember to take it down in the event of inclement weather!

