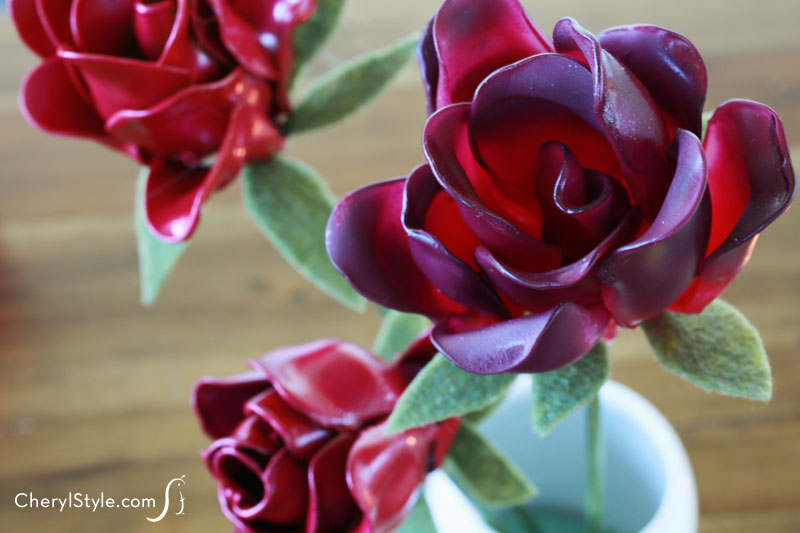
DIY plastic spoon flowers
At Everyday Dishes & DIY, we are all about making fun crafts especially while saving money! So we were really excited about trying plastic spoon flowers. Spoons can either be recycled after a party or purchased at your local dollar store. With the exception of wood skewers, you probably already have most of the supplies at home.
Using colored spoons will save time (this project is not a speedy one) but spray-painting your roses makes them more unique to fit your personal décor. If you’re up to the task, try a gradation of three colors from the same family to make your roses even more realistic. Just be sure to use spray paint that’s suitable for plastic or your flowers may start wilting right before your eyes!
Speaking of spray painting, we found it helpful to have a block of Styrofoam handy so that we could stand the flowers upright and coat them evenly. This way, you don’t touch them and risk a smudge or two.
Making plastic spoon flowers is not a good craft for kids. Using heat can be tricky and spray painting tends to get messy. If you want to forgo the tears and avoid a disaster, take on this project by yourself.
When softened over a candle’s flame, plastic will get hot so you can mold it into ‘petals.’ You really do need to be careful so you don’t get burned.
- 3 thin wood skewers
- green acrylic craft paint
- small brush
- candle and glass plate
- 30-36 plastic colored spoons (10-12 per rose)
- craft scissors
- glue gun
- glue sticks
- indoor/outdoor spray paint suitable for plastic (optional)
- 1 sheet green felt
- floral foam or Styrofoam
- small vase
- Paint 3 thin wood skewers with green acrylic craft paint, using a brush. Stand them up in a scrap block of Styrofoam to dry.
- Place a candle on a glass plate or in a candleholder and light it.
- Turn a plastic spoon upside down and hold it over the flame—high enough not to discolor or burn it but low enough to soften the plastic. As it melts, roll the edges of the spoon inward to form the shape of a rosebud—make sure to leave a small opening at the bottom for the ‘stem.’ When finished, soften the neck of the spoon by melting it, snip it off with craft scissors then set aside.
- Insert one of the painted skewers into the opening you’ve left at the bottom of the bud and secure with a dab of hot glue.
- Hold another spoon over the flame with the correct side up. As it melts, slightly bend the tip of the spoon backwards to form a petal. Soften the neck over the flame then snip (if necessary, smooth the snipped edge by softening then pressing it down on the glass plate).
- To join the petal to the bud, glue them together at the bottom, gently squeezing with your fingers to secure (but don’t get burned!).
- Make a second petal, join it to the other side of the bud using the same process then continue making petals and attaching them at the bottom with glue as the flower grows as large as you want.
- Once you’re satisfied with your rose, complete the other 2 roses.
- If you’ve used colored spoons, you’re almost finished. If you want to give your roses a more personal touch, spray paint them with paint that is suitable for plastic then place them into a block of Styrofoam to dry.
- While your roses are drying, get your felt and cut 5 sepals (the small green foliage that protect the bud before it blooms) in the shape of small leaves. Glue them to the underside of the rose. Repeat for the remaining 2 roses.
- Place floral foam or Styrofoam into the vase and arrange roses.

