Stenciled Polka Dot Floppy Hat
This cute polka dot floppy hat will have you ready for those long, sunny summer days at the beach or by the pool. You can also wear it when you’re out shopping on vacation!
It’s a really easy and simple DIY project. The whole thing only takes about 20 minutes from start to finish.
We like this blue and white pattern, but you can make the circles any color that you want. Match them to your bathing suit, favorite summer outfit, or even your vacation spot!
Don’t have a two-inch circle die cut? You don’t need to go out and buy one. Just use the bottom of a cup instead. Trace circles around it with a pencil and then fill them in with the fabric paint.
This post includes links to purchase items you’ll need from our affiliates.
Polka dot floppy hat instructions
Stenciled Polka Dot Floppy Hat Instructions
Ingredients
- [url href=”http://www.amazon.com/gp/product/B0090JVF1A/ref=as_li_qf_sp_asin_il_tl?ie=UTF8&camp=1789&creative=9325&creativeASIN=B0090JVF1A&linkCode=as2&tag=chery01-20&linkId=3IRNHVXH42QQO7AU” target=”_blank” title=”2″ circle die cut”]circle 2″ die cut[/url]
- card stock
- spray adhesive
- hat
- fabric paint
- foam brushes
Instructions
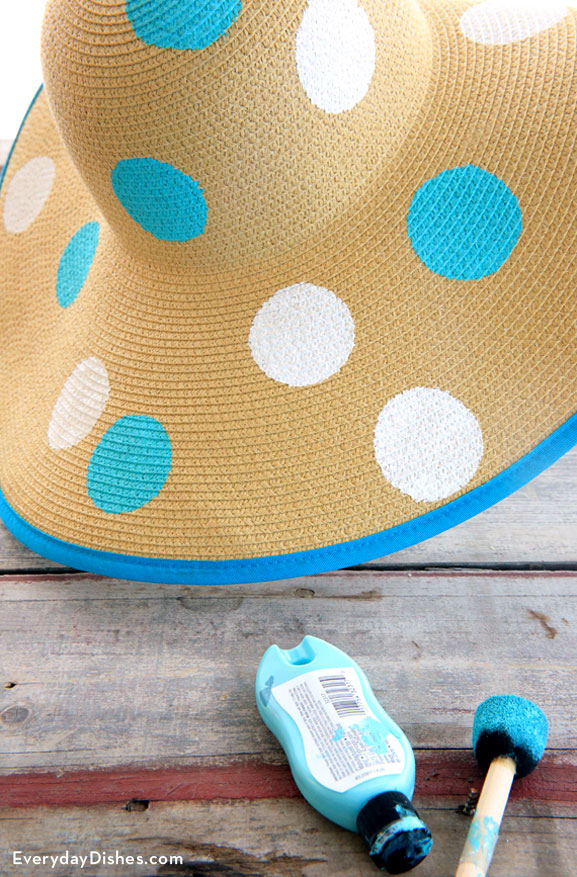
- Using a 2″ die cut, cut out two circles spaced 2″ apart on a sheet of card stock.
- Spray adhesive on the back of the stencil and press onto hat where desired.
- Pour small amounts of each colored fabric paint onto scrap paper or paper plates. Dab your brush with one color then dab onto the stencil. Repeat for the second color, using a clean brush.
- Carefully lift stencil up and place it approximately 2″ away from the previous circles. Paint two more circles then repeat the process over the entire hat until you’re happy with your design. Allow the paint to dry before wearing.
Notes
This is the perfect summer fashion DIY!