DIY Wooden Pumpkins
DIY wooden pumpkins are the perfect fall décor. Scrap wood, a chisel, sandpaper, spray paint and stain are all you’ll need!
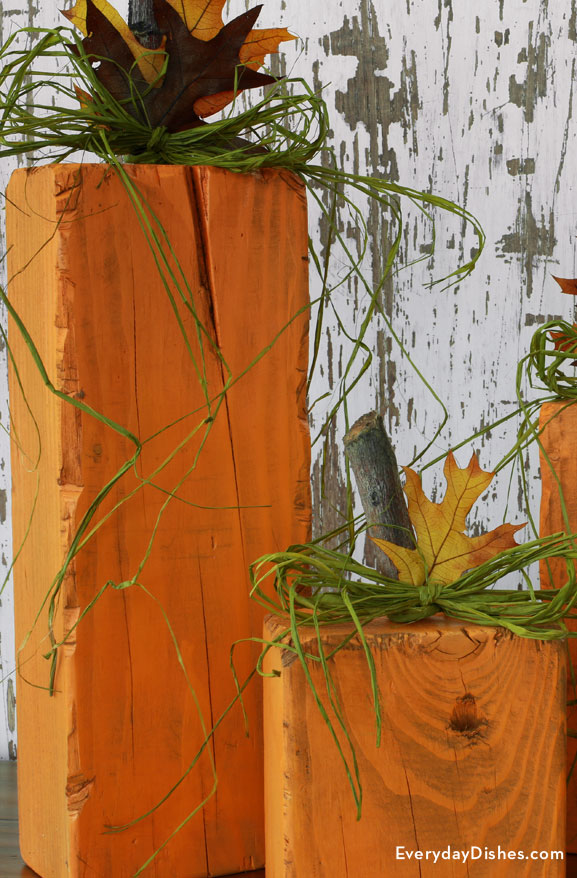
We used three solid blocks of wood to make our pumpkins appear chunky and stand upright more easily, but you can also use boards that aren’t quite as thick.
If you’re not handy with a saw, grab a neighbor to help you out or purchase a board at your local home improvement store and they’ll cut it for you.
Using a chisel to rough up each board is no big deal. Don’t worry if an edge or corner splits off—it’ll make your pumpkins look more distressed. Applying stain on top of the paint then wiping it off completes the desired effect.
DIY wooden pumpkins instructions
DIY Wooden Pumpkins Instructions
Ingredients
- 4″ x 6″ board cut 6″, 10″ and 15″ high
- chisel
- coarse sandpaper or electric sander
- clean rag
- spray paint
- foam brush
- wood stain
- paper towel
- narrow tree branch 15″ long, cut 4″, 5.5″ and 6.5″
- hot glue gun
- raffia
- leaves
Instructions
- Stand each block of wood upright. Use a chisel to cut away the corners and edges of each block for that rustic look. Once satisfied, sand the corners to make them more rounded. Wipe clean with a rag.
- Apply one coat of the spray paint then allow the blocks to dry completely.
- Brush stain on top of the paint then quickly wipe excess away, using a paper towel. Allow the pumpkins to dry 5–10 minutes.
- While you’re waiting for your pumpkins to dry, trim or sand one end of each cut branch so it will stand flush on top of the pumpkin. Attach stems using hot glue then press to adhere.
- Tie raffia around each stem and add leaves for that final touch of fall.
Notes
If you’re planning to display these pumpkins outdoors, be sure to use exterior spray paint and waterproof stain.