DIY Bird Feeder
Homemade bird feeders not only spruce up the backyard—they also invite your feathered friends to come and play. It’s a great weekend activity for the kids and the best part is that the mess stays where it should—outside!
If you’re an avid crafter, you probably have most of the supplies you need in the activity closet. You don’t need a lot of paint (if any), so it’s a great way to use up those crusty old bottles of craft paint—you know what we’re talking about!
Once your bird feeders are complete, make a day of finding fun places to hang them in the yard and see how quickly the birds come to get some snacks. If bird-watching is your thing, grab some binoculars too!
How to make a DIY bird feeder
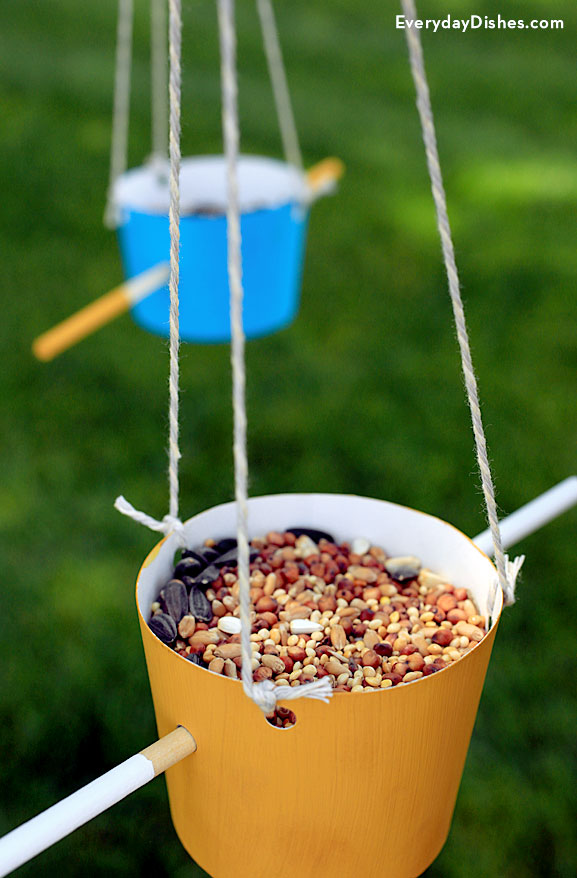
How to Make a DIY Bird Feeder
Ingredients
- scissors
- paper cup
- paint (optional)
- hole punch
- wooden dowel
- bird food
- 3 pieces of twine, cut 15″ each
Instructions
- Using scissors, make a slit halfway down the paper cup then cut all the way around. Paint the bottom portion if desired and allow it to dry.
- Using a hole punch, make two holes halfway down the cup and diagonal from each other. Insert the dowel through the holes.
- Punch three holes closer to the rim, spacing them evenly from one another.
- Thread twine through each hole, knot to secure then tie all together at the top.
- Fill with seed then hang feeder from tree branch.
Notes
We always have paper cups around the craft room for paints and such, so this is a really fun way to include them in a craft!