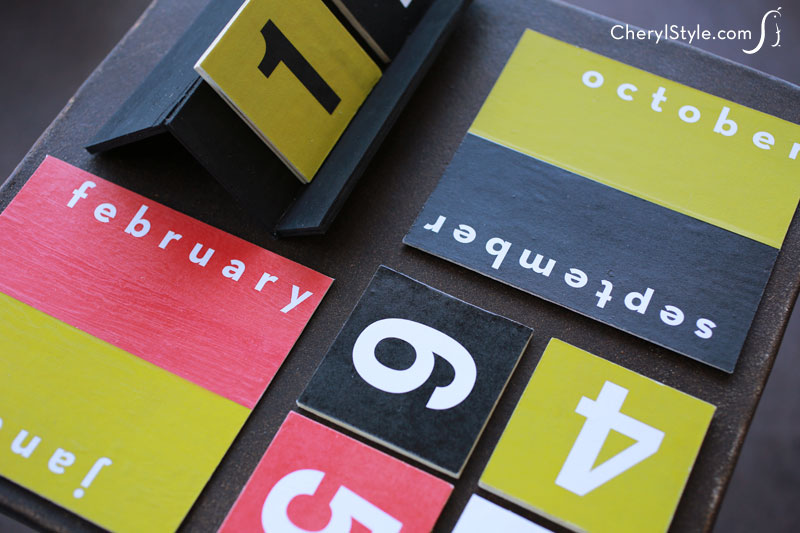
DIY desktop calendar
Do people still use paper calendars that take up valuable wall space and have to be replaced year after year? Not us! We made a DIY desktop calendar that’s just the right size, super stylish and perfect for keeping track of what day it is.
A trip to your local craft store for packs of thin hardwood, decoupage glue and acrylic sealer along with our printable will make a stylish calendar that can be seen easily with just a quick glance. Place on a desk at home or the office, or gift it to a co-worker or the boss—it’s one gift that will last for years!
This project isn’t difficult to do but you won’t be able to complete it all at once, as there is some drying time involved. You may want to have a utility knife handy—we found it easier to cut through thicker wood than using a precision knife.
Speaking of wood, don’t be surprised that the contents of your craft wood package don’t have the exact same measurements as labeled from the manufacturer. It was driving us crazy so we wanted to know why.
Evidently wood shrinks when first dried at the mill, so what starts out as 2″ x 4″ actually ends up losing half an inch off both its thickness and width.
When it comes to craft projects, hardwoods reign supreme. Some have a smooth finish on just one side while others are finished on both sides, making final measurements different for each.
So, when we say ‘approximately’ when referring to measurements for crafts using wood, we really mean it! You don’t need to be a carpenter or even a math expert—just use common sense. After all, no one’s going to whip out a ruler to judge your accuracy!
- 1 pack (6 pc) Wood Slats 7 4/25″ x 2¾” x 4/25″ (found in kids’ craft area at Michaels)
- hot glue
- ruler and pencil
- precision knife or utility knife
- coarse sandpaper
- black acrylic paint and brush
- 3 sheets of 1/32″ x 6″ x 12″ birch plywood
- desktop calendar printable
- scissors
- [url href=”http://www.amazon.com/gp/product/B001IKES5O/ref=as_li_qf_sp_asin_il_tl?ie=UTF8&camp=1789&creative=9325&creativeASIN=B001IKES5O&linkCode=as2&tag=chery01-20″ target=”_blank”]decoupage glue[/url]
- sponge brush
- [url href=”http://www.amazon.com/Plaid-Mod-Podge-1469-12-Ounce/dp/B003VY9DNM/ref=sr_1_fkmr0_2?ie=UTF8&qid=1423688875&sr=8-2-fkmr0&keywords=modpodge+acrylic+sealerCode%3Das2″ target=”_blank”]spray acrylic sealer[/url]
- First, we’ll make the calendar stand. Plug in your glue gun and open up your ‘Wood Slats’ pack. Once the glue is hot, line up two pieces of wood slats to make a V shape. Glue them together and let dry.
- Measure and cut a third piece approximately 1″ x 7 1/8″ using an X-acto knife or utility knife. You’ll need some elbow grease to cut through as much as you can then line it up against the counter to completely break in half. Sand down any jagged edges with coarse sandpaper. Next, glue it to the top of the ‘V’ to form a ‘W’ shape with 1 short arm. Paint your stand with black acrylic paint and let dry.
- For the numbers, use either knife to cut 6 squares each measuring 2¾” x 2¾”. Again, cut through as much as you can then line it up against the counter, break in half then sand down the jagged edges.
- Next, take two pieces of birch plywood and cut each one in half widthwise to make 4 pieces (you’ll use only 3) for the months (each will be approximately 6″ x 6″).
- For the weekdays, use the 3rd piece of birch plywood to cut two pieces each approximately 6″ x 4″ and discard the leftover scraps.
- Download the [url href=”https://everydaydishes.com/wp-content/uploads/2013/11/diy-desktop-calendar-cherylstyle-cheryl-najafi-printable.pdf” target=”_blank” title=”Everyday Dishes & DIY Desktop Calendar”]Everyday Dishes & DIY DIY desktop calendar[/url] and open it in [url href=”http://get.adobe.com/reader/otherversions/” target=”_blank” title=”Adobe Reader”]Adobe Reader[/url].
- You’re ready to decoupage! Starting with the months, take 1 piece of 6″ x 6″ birch wood and cover 1 side with decoupage glue. Place the January/February cutout over the glue and smooth out with a ruler. Allow it to dry then cut off any excess paper with an X-acto knife. Repeat on the back and the other 2 pieces of wood using the rest of the month cutouts.
- For the weekdays, take 1 of the 6″ x 4″ pieces of birch wood and cover 1 side with decoupage glue. Place the Monday/Tuesday cutout over the glue, smooth out with a ruler, allow it to dry then cut off excess paper with an X-acto knife. Repeat on the back as well as on the other piece of wood.
- Ready for numbers? Take 1 of the 2¾” x 2¾” pieces of wood and cover 1 side with decoupage glue. Place the ‘0’ over the glue, smooth out with a ruler, allow it to dry then cut off excess paper. Repeat on the back with the number ‘1’. Pair the remaining numbers together (front and back) as follows: 0,1; 1,2; 3,4; 5,6; 7,8; and 2,9.
- Spray the front and back of the entire set with acrylic sealer, allow to dry for 24 hours then place it in a prominent place or gift it to a co-worker.