DIY rolled brush holder
Lack counter space to store your expensive makeup brushes? Our DIY rolled brush holder not only organizes them but also makes a perfect carrier for travel!
To make this simple project, you’ll only need a few items, some of which you most likely have around the house—a marker, ribbon, glue, scissors and a few embellishments such as buttons and tags.
You may need to buy a bamboo placemat and Fray Check, a terrific liquid product that seals fabric seams, but they’re both inexpensive.
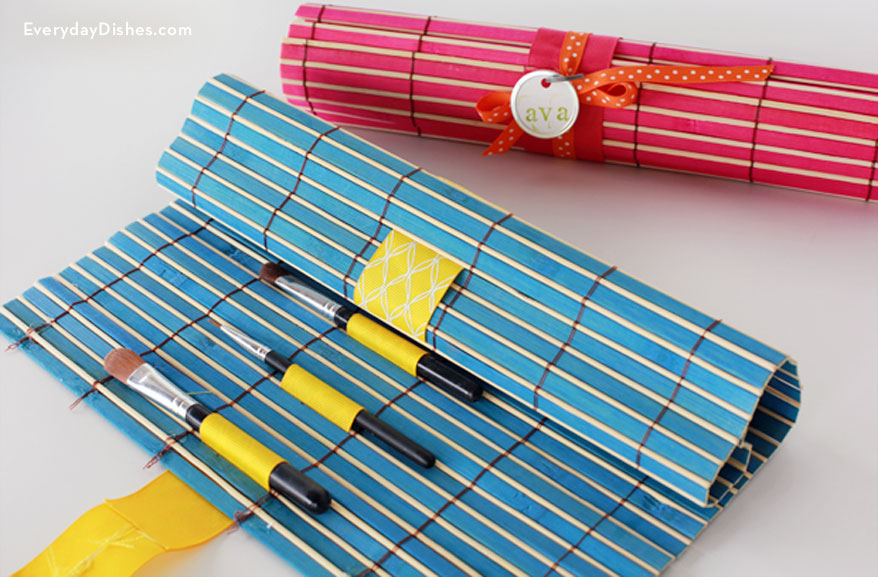
Simply arrange your brushes on the placemat, marking their placement, and gently pry the bamboo slats apart with scissors so you can thread the ribbon through the slats. Insert all the brushes under the ribbon loops, pulling the ribbon tight enough to hold them in place. If you prefer a tighter hold, substitute elastic for the ribbon.
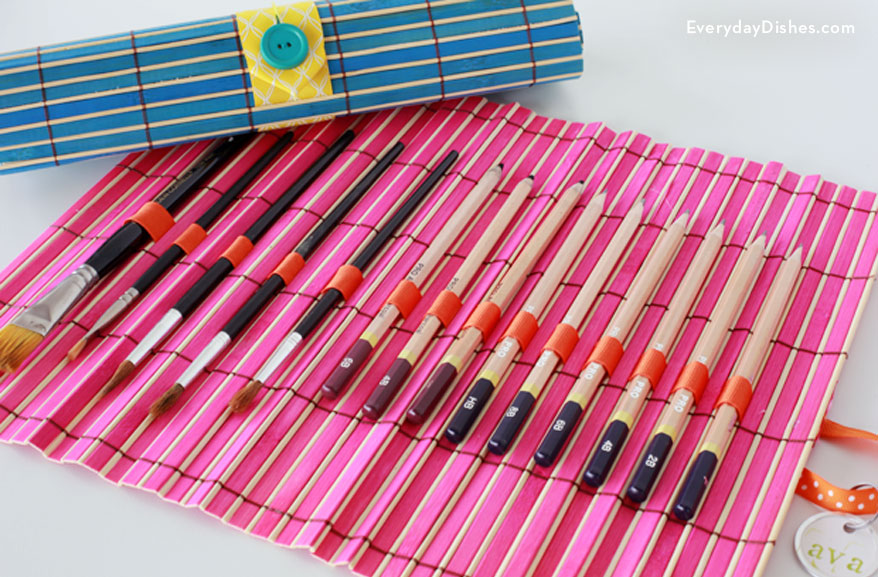
We give you a choice of two options to finish your rolled organizer. The first option allows for ribbon ties to secure the rolled placemat. The second option uses a button and a slit in the ribbon to keep the organizer rolled. Either choice can be personalized with embellishments.
Our rolled brushed organizer makes a great gift as well! It’s practical and takes up little space, can easily fit in a gym bag or carry-on and can be customized for a person’s individual style.
Know an art student going off to school? Simply adapt it for paintbrushes and palette knives! It’s a perfect way in which to transport them to class.
Organization doesn’t have to be expensive—it just takes a little thought. We bet you’ll be inspired! After all, it’s all about making life easier, isn’t it?
DIY rolled brush holder instructions
- bamboo placemats
- scissors
- permanent marker
- fabric ribbon
- [url href=”http://www.amazon.com/gp/product/B0019KBWA2/ref=as_li_qf_sp_asin_il_tl?ie=UTF8&camp=1789&creative=9325&creativeASIN=B0019KBWA2&linkCode=as2&tag=chery01-20%20embellishments%20%28buttons,%20key%20tags,%20stamps%20&%20stamp%20pad,%20etc%29″ target=”_blank” title=”Fray Check”]fray checker[/url]
- glue
- Roll out placemat on flat surface.
- Lay out brushes as you want them on placemat.
- Mark placemat with a marker on both sides of brushes (so you know where to thread the ribbon through).
- Thread ribbon through placemat, using scissors to gently pry bamboo slats apart to make moving ribbon through easier.
- Continue threading ribbon until you have made your way across the whole placemat.
- When finished threading, ribbon loops should be the only thing you see.
- Insert all brushes under ribbon loops, pulling ribbon so there is room to insert brushes, but still tight enough to hold them in place.
- Cut ribbon and glue both ends to placemat (fold over end of ribbon before gluing to finish ends).
- Take brushes out and flip placemat over.
- Measure, cut and glue ribbon to finish backside (should be just as wide as placemat).
- Use Fray Check on ends of ribbon to keep it from fraying.
- Measure and cut ribbon for wrap tie (should be long enough to easily tie when rolled up).
- Use Fray Check on ends of ribbon to keep it from fraying.
- Glue middle of wrap, tie ribbon to left side of placemat (so when you roll it up from right side, you have the 2 ends of ribbon to tie with).
- Stamp paper key tag.
- Flip placemat over, insert brushes, roll up and tie with personalized key tag.
- Cut ribbon on right side and glue to placemat (fold over end of ribbon before gluing if you want a finished end).
- Roll placemat up and wrap ribbon around to where you want to secure it with button (leave brushes in place so you have an accurate measurement).
- Cut ribbon, leaving a bit more to make sure you have enough.
- Remove brushes.
- Fold ribbon over and cut slit for button and sew button on ribbon of roll. Test out button hole and button to make sure it’s easy to secure.
- Use Fray Check on button hole to keep it from fraying once hole is the right size.
- Make final cut of ribbon, allowing enough to fold over to make a finished edge.
- Fold down both corners of ribbon and glue in place.
- Insert brushes, roll up and button.