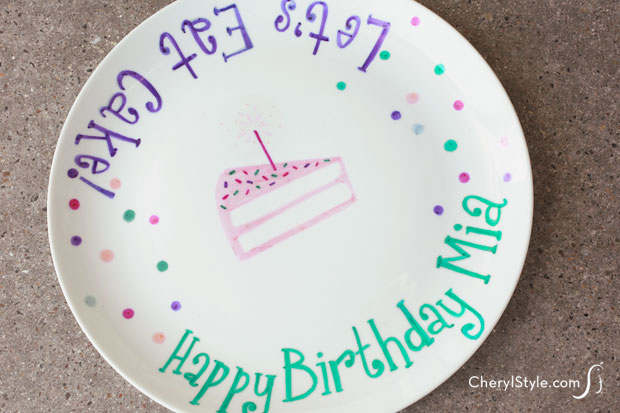
Personalized birthday plate
Use your creativity to make a personalized birthday plate for the birthday girl or boy! It’s not hard to do and you don’t need to be an artist to make it look great.
Search your cupboard for an inexpensive plate or head to your local dollar store—remember, you’re not looking for fine china. Use our plate as an example or come up with your own design. If you’re worried about your drawing capabilities or never got high marks for your handwriting, simply use stencils to help you out.
You’ll need oil-based paint pens for this project, as the plate needs to bake in the oven to set the paint. It does require hand washing but that’s how you keep it looking like new so you can bring it out every year to celebrate!
- large ceramic white plate
- oil-based paint pens
- stencils (optional)
- painter’s tape (optional)
- Preheat the oven to 350 degrees.
- Sketch out a few designs on paper to see how they will look on your plate. Once you’re confident of your design, proceed to draw it on the plate using oil based paint pens. Use painter’s tape as a guide if desired.
- If you don’t trust your handwriting or artistic abilities, trace stencils of letters and party items such as cake, balloons or gift boxes.
- Once you’re finished, place your plate in the oven for 30 minutes—be sure the kitchen is well ventilated.
- Allow the plate to cool completely inside the oven then remove it and wash by hand. Use a soft cloth, not an abrasive cleaner or scrubber, and your plate will always look like new.

