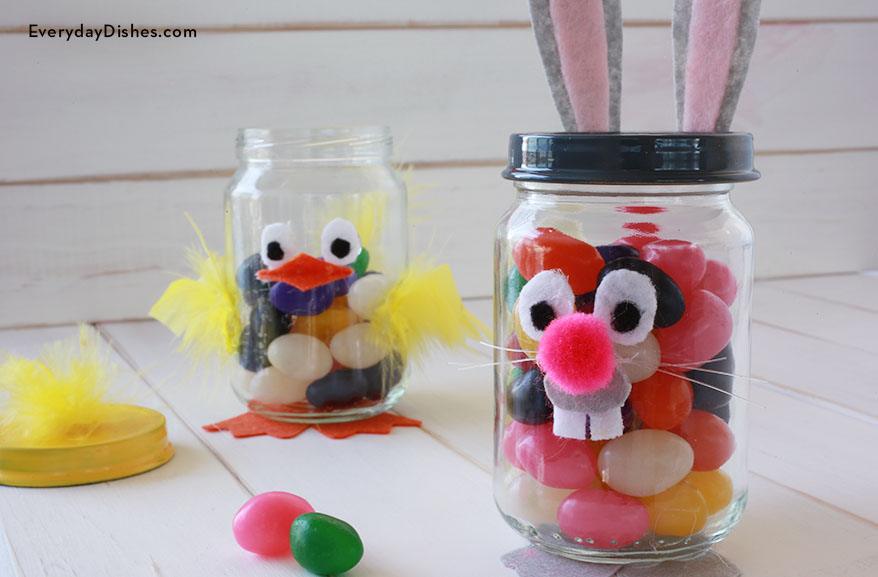
Easter treat jars
Upcycle old baby food jars and get out your hot glue gun to make these adorable Easter treat jars. Scrap felt and embellishments plus our easy instructions will have you finished with this super inexpensive craft in no time!
Small clear jars simply decorated make it easy to see the delicious goodies inside, and because Easter candies are usually pastel colored, they make an especially nice addition to your holiday table if placed at each setting.
Candy’s not the only thing with which to fill these jars. A small trinket like a necklace or a fancy little race car is sure to put a smile on your child’s face (and prevent cavities at the same time).
We’ve given you three options to get you started—a bunny, a chick and a bluebird—but see what other animals you can create (and let us know!). The kids can even help you out but make sure you’re available to supervise—that glue gets hot!
Easter treat jars instructions
- baby food jars with lids (or any small glass jar with lid)
- adhesive remover
- spray paint (use a spray paint with primer for one coat painting)
- stiff felt (various colors)
- pom poms
- fishing line
- feathers
- hot glue gun
- This is a great project for using old jars you already have on hand. All it takes is a little bit of prep work to get them ready. Just wash and dry the jars. Remove any label residue with adhesive remover.
- Once you’ve created your character (or characters if you want to create all 3), fill the jars with jelly beans, Easter candy or other small treats and gift them or include in an Easter basket.
- Remove the lid, spray paint it gray then allow it to dry. Apply another coat if necessary.
- Cut out ear shapes from gray and pink stiff felt. Glue the pink felt to the gray felt and then glue both ears to the back of the lid.
- Cut a mouth out of gray stiff felt and teeth shapes out of white stiff felt. Glue the teeth to the mouth then glue the mouth to the front of the jar.
- Next, cut 6 pieces of fishing line and dab a small amount of glue to the back of the pink pom pom—don’t use too much or you’ll have a mess on your hands! Hold them in place until the glue cools and hardens. Glue the ‘nose’ to the front of the jar.
- Cut eye shapes out of white and black stiff felt, glue them together then glue them to the front of the jar, just above the mouth.
- The last step is to cut feet shapes out of gray stiff felt, glue them to the bottom of the jar and glue the white pom pom ‘tail’ to the back of the jar.
- Remove the lid, spray paint it yellow then allow it to dry. Apply another coat if necessary.
- Fold a small piece of orange stiff felt in half and cut a triangular shape using scissors. Apply a VERY small amount of hot glue to the inside crease of the beak and pinch closed. Apply a dab of glue to the outside crease of the beak and glue the beak to the front of the jar.
- Cut eye shapes out of white and black stiff felt, glue together then glue to the front of the jar just above the beak.
- Next, cut feet shapes out of orange stiff felt and glue to the bottom of the jar.
- Trim small pieces of yellow feathers and hot glue to the sides of the jar for wings, the back for a tail feather and the top of the lid.
- Remove the lid, spray paint it blue then allow it to dry. Apply another coat if necessary.
- Fold a small piece of yellow stiff felt in half and cut a long, triangular shape using scissors. Apply a VERY small amount of hot glue to the inside crease of the beak and pinch closed. Apply a small amount to the outside crease of the beak and glue to the front of the jar.
- Cut eye shapes out of white and black stiff felt, glue together then glue to the front of the jar just above the beak.
- Cut feet shapes out of yellow stiff felt and glue to the bottom of the jar.
- Trim small pieces of blue feathers and hot glue it to the sides of the jar for wings, the back for a tail feather and the top of the lid.

