Travel Keepsake Box
With the advent of digital cameras, it’s easy to file your vacation photos you’ve snapped away on the computer. You might make a photo book or two and of course you will probably share them on Facebook.
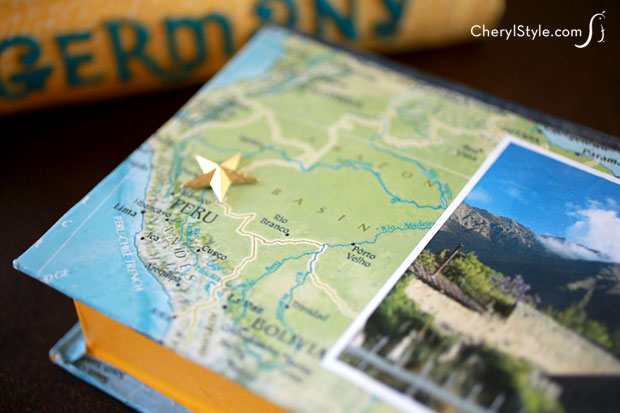
But what do you do with the postcards, maps, ticket stubs and other mementos you have collected on your travels? If you’re like us, they are stuffed away in the ‘don’t know what to do with’ drawer or closet. We figured it was time to get organized so we made a travel keepsake box for each place we visited to store all of our trinkets.
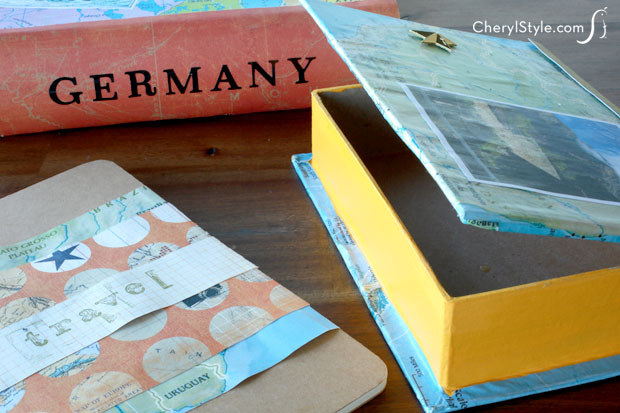
It is super easy to make and the supplies are inexpensive. All you need is a paper mache book box, or a box you already have, scrapbook paper and adhesive letters. You can cover the box with a map of the places you have visited and mark your trip from city to city with a permanent marker. If you want to decorate it even more, add fun photos or travel stickers.
Then clean out your drawers and fill your boxes with travel treasures. They are stylish enough to stack on your bookshelf and you can easily pull them out to relive the good memories at any time!
How to make a travel keepsake box
- paper mache book box (or any sturdy box)
- paint and foam brush
- maps and scrapbook paper
- scissors or X-acto knife
- decoupage glue
- foam brush
- adhesive letters
- craft glue
- travel memorabilia photocopies (postcards, postage stamps, photos, etc.)
- embellishments as desired
- Paint ‘pages’ of book or sides of box and allow them to dry completely.
- Cut map to fit front and back of the box—don’t worry about completely covering the spine because you’ll be using scrapbook paper for that area. Brush glue over front and back covers of the box then cover with map. Apply more glue to front and back covers with brush, completely sealing the map—if you’ve cut your map a little short, fill in with small scrap pieces from a map then glue them into place to cover the exposed areas. Allow the covers to dry completely.
- Cut scrapbook paper to a size that allows it to cover the spine of the box, then label it with adhesive letters. It’s a lot easier to do this when the paper is flat, before you glue it to the spine.
- Glue scrapbook paper in place by applying glue to the edges of the front and back cover. Don’t glue the entire piece of paper to the spine or you’ll have problems opening and closing your box.
- Glue memorabilia to the front and back of the box. Then apply a protective layer of glue and allow it to dry.
- Fill with mementos from your travels and display.