School project organizer
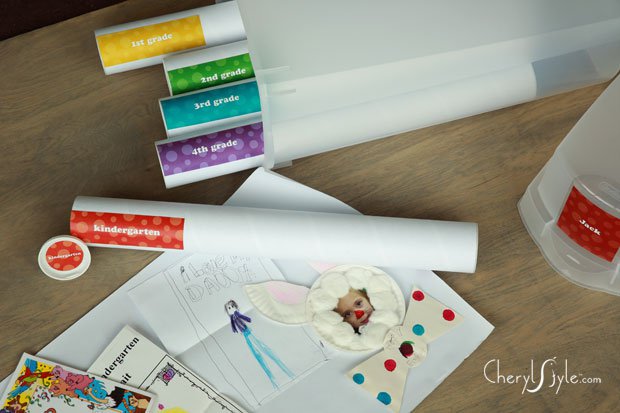
Collect your child’s school projects in this DIY school project organizer. Simply print out our school year labels and attach to oversized mailing tubes. All you have to do is roll up the year’s worth of your favorite schoolwork, and store safely in the tube. As the years progress, store the tubes in a giftwrap organizer–you can have one for each child!
DIY school project organizer instructions
Ingredients
- white mailing tubes with caps (3”W x 30”H, found at office supply store)
- Everyday Dishes & DIY school project organizer printable
- printer
- paper and double-sided tape
- [url href=”http://www.containerstore.com/shop/giftPackaging/organizers?productId=10011134&N=72461&Ns=p_sort_default%7C0?utm_source=cherylstyle” target=”_blank” title=”Verticle Gift Wrap Organizer”]vertical gift wrap organizer[/url]
- scissors
- roll of kraft paper
- Post-it tape
Instructions
- Download the [url href=”https://everydaydishes.com/wp-content/uploads/2013/05/school-project-organizer-template-cherylstyle.pdf” target=”_blank” title=”Everyday Dishes & DIY School Project Organizer”]Everyday Dishes & DIY school project organizer printable[/url] and open in [url href=”http://get.adobe.com/reader/otherversions/” target=”_blank” title=”Adobe Reader”]Adobe Reader[/url].
- Customize with your child’s name and print.
- Cut labels with scissors and tape grade label to sides and ends of tubes.
- Tape child’s name label to gift wrap organizer.
- Select projects, artwork and papers to save and organize.
- Lay out large pieces of craft paper.
- Arrange and tape selected projects to craft paper.
- Roll up craft paper and secure with Post-it tape.
- Place in tube and secure cap.
- Place tubes in gift wrap organizer.
- Store organizer away for safe keeping.
Notes
Go the extra mile and print the school year labels on removable full sheet labels. It will stick even better than double sided tape!