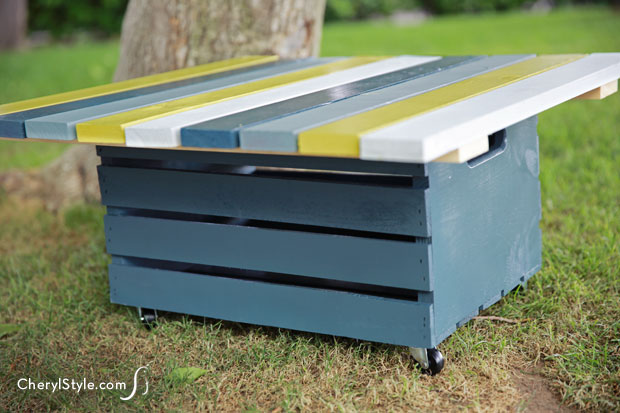
DIY storage table
Looking for additional storage for small outdoor items? If you’re handy with a drill and love to put things together, this DIY storage table is the project for you.
We picked up an unfinished wood crate, which you can easily find at most craft or home improvement stores, added a few boards to make a tabletop and painted them with different colored spray paints.
Adding castors for portability makes this versatile project one to brighten up your outdoor living space while offering you a place to set your drink and store your stuff.
This post includes links to purchase items you’ll need from our affiliates.
DIY storage table on wheels instructions
Ingredients
- 4 – 1 x 3 x 6 Kiln-Dried Whitewood Softwood Board
- spray paint (mix of colors and finishes)
- 18″ x 13.75 x 9.5″ unfinished wood crate
- pencil
- drill
- drill bit that is smaller than circumference of screw
- wood glue
- 4 – 2″ rubber swivel casters
- ½” flat philips wood screws
- 1 ¼” wire brads
- pencil
- hammer
Instructions
- Cut 1 x 3 x 6 boards into 2′ lengths to create 11 pieces.
- The hardware store should cut boards for you free of charge.
- Spray paint tops, sides and ends of 9 – 2′ wood boards with alternating colors. Hold spray can 6” from board.
- Let dry and repeat until you have full coverage.
- For added dimension and interest, use a mix of flat, satin and gloss spray paint.
- Spray paint remaining 2′ boards and wood crate inside and out with one solid color that matches or coordinates with your slat colors.
- Let dry and repeat until you have full coverage.
- Let all pieces dry thoroughly.
- Turn crate upside down on hard surface.
- Position and mark with pencil where to place casters. Don’t position too closely to edge or you may split the wood.
- Use drill and drill bit to pre-drill holes for screws for all 4 casters.
- Attach casters with screws.
- Arrange 9 painted boards in order you like.
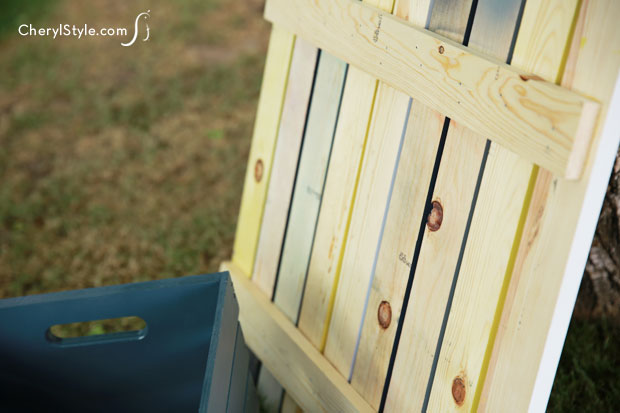
- Turn painted boards so unpainted sides are facing upwards.
- Space painted boards the width of a pencil apart. Use a pencil or your finger to get even spacing between all of the boards.
- Place crate top side down and centered on painted boards.
- Place remaining 2 unpainted boards on either side of the crate (these are the support boards). Make sure that the boards to be glued together are both unpainted in order for wood glue to adhere.
- Remove crate and mark where to put the 2 support boards with a pencil.
- Squeeze wood glue in the marked areas and put support boards in place.
- Hammer at least 2 brads into each painted board and both support boards to secure.
- Let glue dry for at least 1 hour. Flip top over and place on crate.
- Use storage table for poolside storage or for an outdoor game table/storage. This table is not weatherproof and items kept inside are not protected from the elements.
Notes
Brad nails are thinner and lighter than finish nails. They help prevent wood from splitting and the smaller head presents a cleaner appearance.


