DIY Felt Tooth Fairy Pillow
With our printable pattern, a little felt, your sewing skills and fiberfill, you will have a tooth fairy pillow finished in no time!
Although tight machine stitches are best to make this pillow last for years, you can still hand stitch it with embroidery thread, or even hot glue parts of it. So don’t worry if you don’t have a sewing machine!
It’s easy to personalize with initials or accessories to make it a true custom design. Add a tulle ballerina skirt for the dancer in the family or ditch the lashes and wings in exchange for a cape for your little guy’s favorite superhero. Your child will eagerly await a visit from the tooth fairy, knowing his tooth is safely tucked away.
All this talk of tooth fairies made us wonder how this custom got started. It seems there’s a bit of sorcery involved, where witches thought they could control people by throwing a part of the body (like hair or teeth) into a fire and casting spells. Teeth were also considered good luck charms as far back as the Viking era, although it’s not uncommon to see beachcombers with a shark’s tooth necklace today!
The early 1900s brought us folklore and the tooth fairy, perhaps to allay the fears and provide comfort for little ones going through this necessary rite of passage. Gifts of sweet goodies or coins were left behind in place of the tooth. Today, as with everything else, inflation has caused the price of a tooth to go up (especially for molars!).
Do you remember how much the tooth fairy left you when you were young?
DIY felt tooth fairy pillow instructions
- tooth fairy pillow pattern
- 9″ x 12″ white craft felt sheet for the tooth
- gold felt for the crown
- scrap felt for the face
- scissors
- sewing pins
- sewing machine
- polyester fiberfill
- embroidery needle and floss
- hot glue gun
- Download the tooth fairy pillow pattern and open in Adobe Reader.
- Cut the patterns out and pin the tooth shape to the white felt (2 shapes) and the crown shapes to the gold felt. Pin the pattern to the felt then cut out. Cut out eyes, nose and mouth from felt. Sew the facial features to the pillow front.
- Pin the 2 pieces of the tooth together then sew around the perimeter of the felt, starting at the top and removing pins as you go. (Take your time when feeding the felt through your sewing machine…there are lots of curves with this pattern so move the felt along slowly). Make sure to leave an opening at the top that will be big enough to stuff with the fiberfill.
- Push a small amount of fiberfill into the roots of the tooth using your fingers or the handle of a wooden spoon. Once the roots are filled, continue taking small amounts of fiberfill to fill up the tooth. Make it as full as you can then set aside.
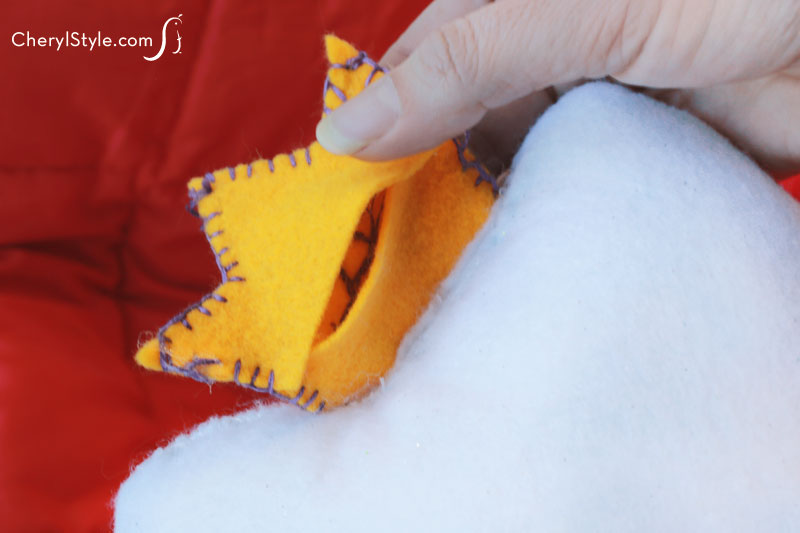
- Stitch the edges of the crown securely together—the tooth is going to go in here. Once the crown is stitched together on all sides, pin it to the opening at the top of the tooth. Fold in the raw edges, pin together to close then hand stitch the opening closed with a needle and thread.
- Your pillow is now ready to give as a gift to that little one who is starting to lose her teeth!

